
Healthcare Interoperability Solutions: What They Are and How They Work
You need patient data to move between systems without breaking, and you need it to happen faster than your last integration project allowed. Every healthcare interoperability solution promises seamless data exchange, but the term covers everything from massive enterprise platforms to narrow point-to-point connectors, and picking the wrong one costs you months.
At its core, interoperability in healthcare means your application can pull and push patient data across EHRs like Epic, Cerner, and Allscripts using shared standards instead of custom code for each system. That's what separates real healthcare interoperability platforms from one-off integration hacks: a unified API, standardized data formats, and built-in handling for authorization and compliance.
This article breaks down what these solutions actually do, how the underlying technology like SMART on FHIR works in practice, and what to look for when you're evaluating healthcare interoperability vendors. We'll also cover where a managed platform like SoFaaS fits, since building this infrastructure yourself is rarely the fastest or safest path for a team focused on shipping product, not maintaining EHR connections.
Why healthcare interoperability solutions matter
The cost of disconnected systems
Fragmented health data isn't just an IT annoyance, it's a direct driver of bad outcomes. A patient who shows up at an emergency room with no accessible history forces clinicians to guess, repeat tests, and delay treatment. Every fax machine and manual data entry step between systems is a point where a med list gets dropped or a lab result never arrives. Healthcare interoperability solutions exist precisely to close these gaps, letting systems exchange structured, standardized data instead of relying on phone calls and PDFs.
Disconnected systems don't just slow down operations, they put patients at risk.
Government agencies have recognized this for years. The ONC's interoperability standards and CMS's data-sharing rules push providers and vendors toward open APIs and away from proprietary data silos. If you're building a healthcare application today, you're not just competing on features, you're expected to meet a baseline of connectivity that regulators increasingly mandate.
Regulatory pressure is accelerating adoption
Rules like the CMS Interoperability and Patient Access rule require payers to expose claims and clinical data through FHIR-based APIs. That single requirement turned interoperability from a nice-to-have into a compliance obligation for a huge slice of the healthcare industry. Vendors that can't demonstrate FHIR conformance and secure OAuth flows are getting cut from procurement lists before they even get a demo. This is a major reason healthcare interoperability companies have multiplied over the past five years: the regulatory floor keeps rising, and organizations need partners who already meet it.
The business case beyond compliance
Beyond avoiding penalties, real interoperability changes how fast you can move. A team that connects to Epic, Cerner, and Allscripts through one unified API ships integrations in days instead of the months a custom point-to-point build usually takes. That speed compounds: faster onboarding means faster revenue, and fewer engineering hours spent on EHR quirks means more spent on the product that actually differentiates you.
Consider what changes when a DME provider, home health agency, or NEMT company adopts a working interoperability layer instead of manual referral intake:
- Referral turnaround drops from days of phone tag to real-time data pulls.
- Duplicate data entry disappears, cutting staff time and transcription errors.
- Care coordination improves because every party works from the same patient record.
- Audit and compliance reporting becomes automatic instead of a manual scramble.
Organizations evaluating interoperability solutions in healthcare should weigh this operational upside as heavily as the compliance checkbox. The providers who move first on real-time data sync aren't just avoiding fines, they're building a faster, cheaper operation that competitors stuck on manual workflows can't match. That gap only widens as more payers and EHRs open their APIs, which is exactly why the next section walks through how these platforms actually move data under the hood.
How healthcare interoperability solutions work
The standards underneath: FHIR and SMART on FHIR
Modern healthcare interoperability platforms run on two layers: FHIR (Fast Healthcare Interoperability Resources) defines how patient data is structured, and SMART on FHIR defines how an app securely requests that data from an EHR. FHIR breaks a patient's record into discrete resources like Patient, Observation, and MedicationRequest, so instead of parsing a giant flat file, your app asks for exactly the resource it needs. Without this shared structure, every EHR connection becomes a custom translation project, which is exactly the cost these standards were built to eliminate.
Standards like FHIR exist so your app speaks one language instead of learning a new dialect for every EHR.
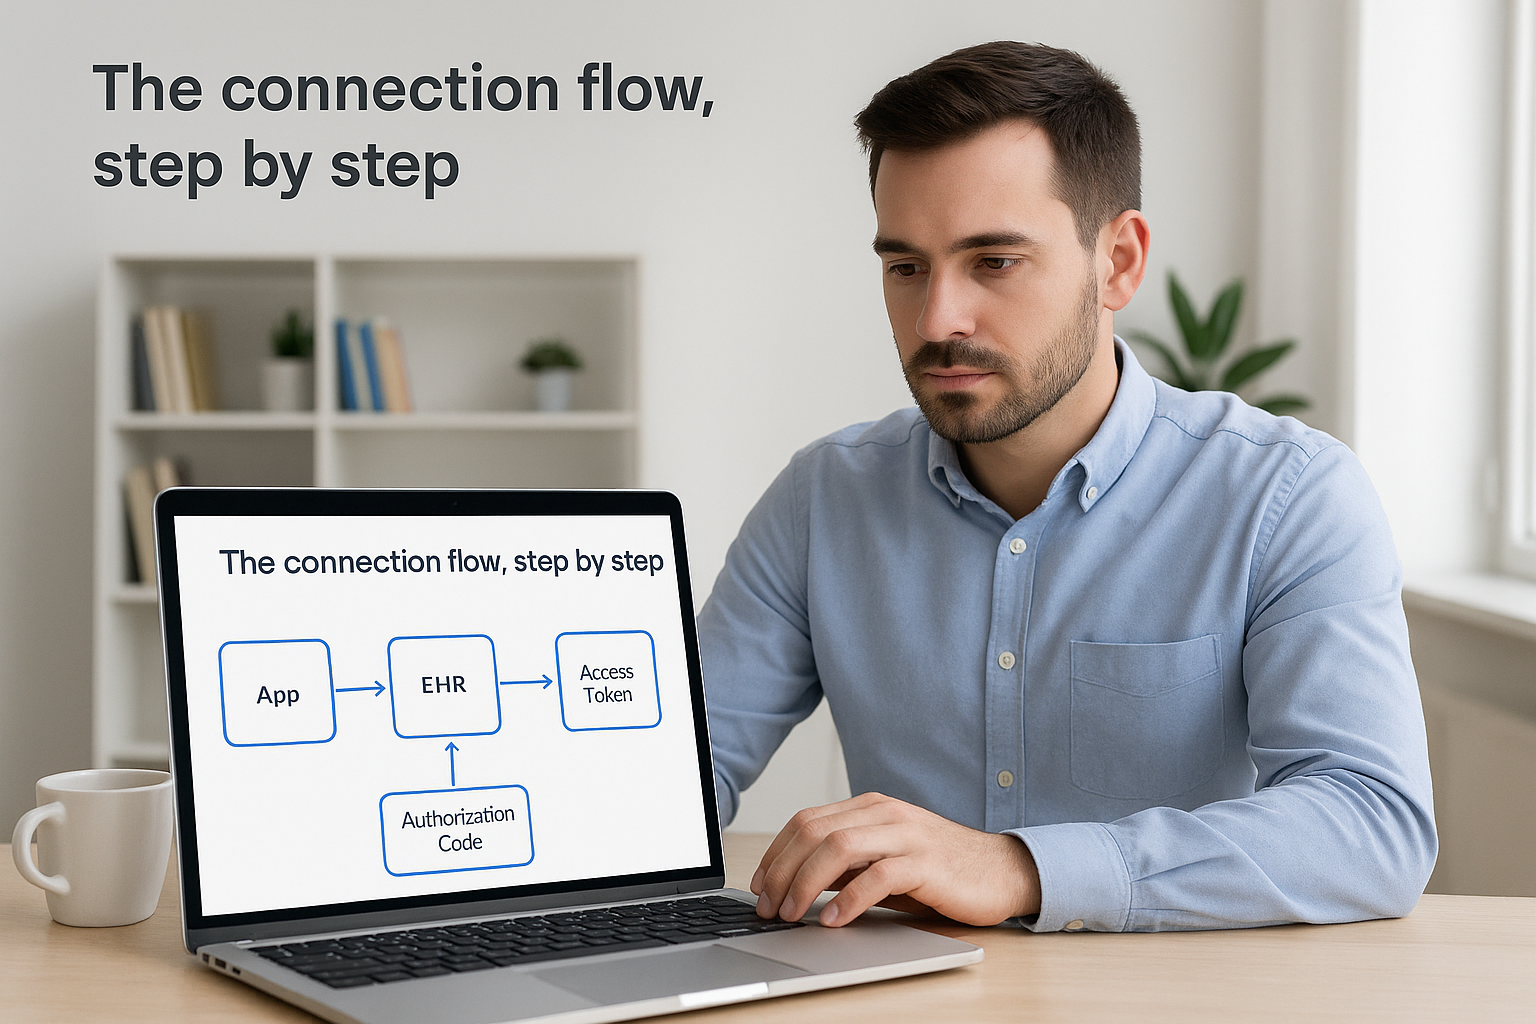
The connection flow, step by step
Getting from "app wants data" to "app has patient data" follows a fairly consistent sequence across EHR systems, even though the underlying vendor implementations differ in frustrating small ways. A typical SMART on FHIR authorization flow looks like this:
1. App redirects the user to the EHR's authorization endpoint.
2. Patient or provider logs in and grants consent to specific data scopes.
3. EHR redirects back with an authorization code.
4. App exchanges the code for an access token via OAuth 2.0.
5. App uses the token to call FHIR API endpoints for allowed resources.
6. Token refresh keeps the connection alive without re-prompting the user.
Getting each of these steps right for Epic, then again for Cerner, then again for Allscripts, is where most in-house integration timelines blow past their original estimates.
Where the unified API fits
Here's the part that actually saves you time: a unified API sits on top of all those EHR-specific quirks and gives your application one consistent interface, regardless of which system holds the data underneath. Instead of writing separate OAuth handling and data-mapping logic for every EHR, you integrate once against the unified layer, and the platform handles vendor-specific authorization, token refresh, and format differences behind the scenes. Requests for structured data still return FHIR resources, but your engineering team stops babysitting the connection itself. That's the practical difference between a bare-bones connector and a managed healthcare interoperability solution, and it's why teams building on SoFaaS can connect to a new EHR in days rather than rebuilding this plumbing from scratch each time.
Types of interoperability platforms and vendors
Not every healthcare interoperability solution solves the same problem, and vendors in this space fall into a handful of distinct categories. Knowing which bucket a vendor sits in tells you more about its limits than any sales deck will. Some healthcare interoperability vendors focus on moving records between hospitals, others on exposing a single EHR's data to third-party apps, and others on abstracting away every EHR at once.
Health Information Exchanges (HIEs)
HIEs are regional or national networks that let hospitals and health systems share patient records with each other, typically for treatment and care coordination purposes. They're built for provider-to-provider exchange, not for a third-party app that needs programmatic, on-demand access to a specific patient's chart. If your product needs live application access rather than institutional record-sharing, an HIE alone won't cover it.
EHR-native APIs
Each major EHR vendor, Epic, Cerner, Allscripts, exposes its own FHIR API and developer program. Connecting directly gives you full control, but you're maintaining separate credentials, rate limits, and quirks for every system your customers use. Teams that serve even three or four EHR vendors end up rebuilding the same OAuth and data-mapping logic repeatedly.
Integration engines and middleware
Legacy integration engines translate between HL7v2, CCDA, and FHIR inside a hospital's own infrastructure. They're powerful for enterprise IT teams managing internal system-to-system traffic, but they're rarely designed for a startup that needs to onboard new patients through a consumer or provider-facing app in days.
Managed FHIR platforms
Managed healthcare interoperability platforms like SoFaaS sit above the EHR-native layer and give you one unified API across multiple EHRs, with authorization, compliance, and token management handled for you.
The right category of vendor matters more than the right feature list.
| Vendor type | Best for | Main limitation |
|---|---|---|
| HIE | Provider-to-provider record sharing | Not built for app-level API access |
| EHR-native API | Deep, single-EHR integrations | Separate build per EHR vendor |
| Integration engine | Internal hospital IT systems | Heavy setup, not startup-friendly |
| Managed FHIR platform | Multi-EHR app integrations | Less low-level customization |
Understanding interoperability solutions in healthcare this way saves you from evaluating an HIE against a managed API platform, since they solve fundamentally different problems.
How to choose the right interoperability solution
Picking a vendor comes down to matching their strengths against what your product actually needs, not chasing the longest feature list. Before you sign a contract with any healthcare interoperability company, run their platform through a short set of questions that expose gaps a demo won't show you.
Coverage, speed, and real testing
Start with which EHRs the vendor actually supports in production, not just on a roadmap slide. Ask for a sandbox and a real timeline: how long does it take to get from signed contract to your first live patient data pull with Epic or Cerner? Vendors selling genuine healthcare interoperability solutions should be able to show you a working connection within days, not a promise of "weeks to months" once contracts are signed.
A vendor's sandbox tells you more in an afternoon than their sales deck tells you in a month.
Compliance, security, and uptime guarantees
Check whether the platform carries SOC 2 Type II certification and documented HIPAA controls, including audit logging and encryption at rest and in transit. Confirm their uptime SLA in writing, since a 99.9% commitment matters a lot more once you have paying customers depending on that connection every day. Look, too, at how patient consent and OAuth token management are handled, because a platform that pushes that complexity back onto your engineering team isn't really managed at all.
Work through this checklist with any healthcare interoperability vendors you're evaluating:
- EHR coverage: Does it include the specific systems your customers already use?
- Time to first connection: Days or months?
- Compliance certifications: SOC 2 Type II, HIPAA-compliant infrastructure, documented audit trails.
- Uptime SLA: Is it guaranteed in the contract, not just marketed?
- Support model: Do you get engineers who understand FHIR, or a generic ticket queue?
Total cost, not just the invoice
Factor in what building and maintaining this yourself would cost in engineering hours, since that's the real comparison point for any managed healthcare interoperability platform. A lower sticker price on a bare-bones connector often hides months of internal work handling token refresh, EHR-specific quirks, and compliance documentation. Once you weigh vendor pricing against the engineering time saved, the calculus for most teams tips firmly toward a managed platform over a self-built stack.
Common challenges in healthcare interoperability
Even with mature standards like FHIR, getting systems to actually talk to each other in production surfaces problems no spec sheet warns you about. Teams that assume SMART on FHIR compliance means smooth data flow often discover the hard way that conformance and real-world reliability are two different things.
Inconsistent data quality and mapping
Epic, Cerner, and Allscripts all implement FHIR resources slightly differently, so a MedicationRequest from one EHR doesn't always map cleanly to the same field in another. Free-text fields, inconsistent coding systems, and missing structured data force your integration layer to normalize information the EHR itself never standardized. This is where a lot of in-house builds quietly fail: the connection works on day one, then breaks the first time a hospital updates its EHR configuration.
Passing a conformance test doesn't guarantee two systems agree on what the data actually means.
Patient matching across systems
Records for the same patient often arrive under slightly different names, birthdates, or identifiers depending on which system generated them. Without a reliable patient matching process, your application risks merging two different people's records or splitting one patient's history across duplicate profiles, both of which are dangerous in a clinical context. Solving this well requires probabilistic matching logic that most product teams have no reason to build from scratch.

Legacy infrastructure and vendor lock-in
Many hospital systems still run internal workflows on HL7v2 or CCDA underneath a modern FHIR facade, so the connection you're building sits on top of infrastructure that's decades old in places. Getting a response from that stack can be slower and less predictable than the FHIR spec implies. Add to that the reality that switching healthcare interoperability vendors later means renegotiating contracts, retesting every EHR connection, and migrating consent records, and it's clear why picking the right partner early matters more than optimizing for the lowest quote today.
The expertise gap
Finally, most product teams simply don't have anyone on staff who has debugged an OAuth handshake against Epic's sandbox or dealt with Cerner's token expiration quirks. That gap is exactly why managed platforms exist, and why building this expertise in-house rarely makes sense for a team whose real product isn't EHR integration itself.
Real-world examples of healthcare interoperability
Abstractions like FHIR and OAuth only prove their worth once you see them running inside an actual workflow. Below are three scenarios pulled from the kinds of organizations that adopt a healthcare interoperability solution in practice, not hypothetical case studies from a vendor's marketing page.
Durable medical equipment referrals
A DME provider used to wait on faxed orders and phone confirmations before shipping equipment, often losing a day or two just chasing missing documentation. With a unified API pulling structured orders and clinical notes directly from the referring provider's EHR, that same referral arrives as a validated FHIR resource the moment it's signed. Staff verify eligibility and ship the same day instead of playing phone tag with a hospital discharge planner.
The fastest DME turnaround times come from eliminating the fax machine entirely, not speeding it up.
Ambulance and NEMT dispatch
Non-emergency medical transport and ambulance providers depend on accurate pickup details, diagnosis codes, and mobility requirements before a vehicle ever leaves the lot. Dispatchers who previously called facilities for this information now receive it through real-time data sync, so a scheduling error that once caused a missed appointment gets caught before the trip is even booked. Ambulance providers using this kind of connection report fewer wasted trips and tighter arrival windows, both of which matter directly to reimbursement.
Patient-facing and provider apps
Consumer health apps that let patients view lab results or request refills rely on the same SMART on FHIR authorization flow described earlier, just pointed at a patient's own record instead of a staff workflow. A few patterns show up repeatedly across these deployments:
- Home health agencies sync visit notes back into the referring physician's EHR automatically, closing the loop without manual charting duplication.
- Chronic care apps pull updated medication lists so patients aren't tracking dosage changes on paper.
- Provider portals surface data from multiple EHRs in one dashboard instead of forcing staff to log into three separate systems.
Each example above solves a different operational problem, but they share the same underlying mechanics: standardized data, automated authorization, and a connection that keeps working after the initial handshake.
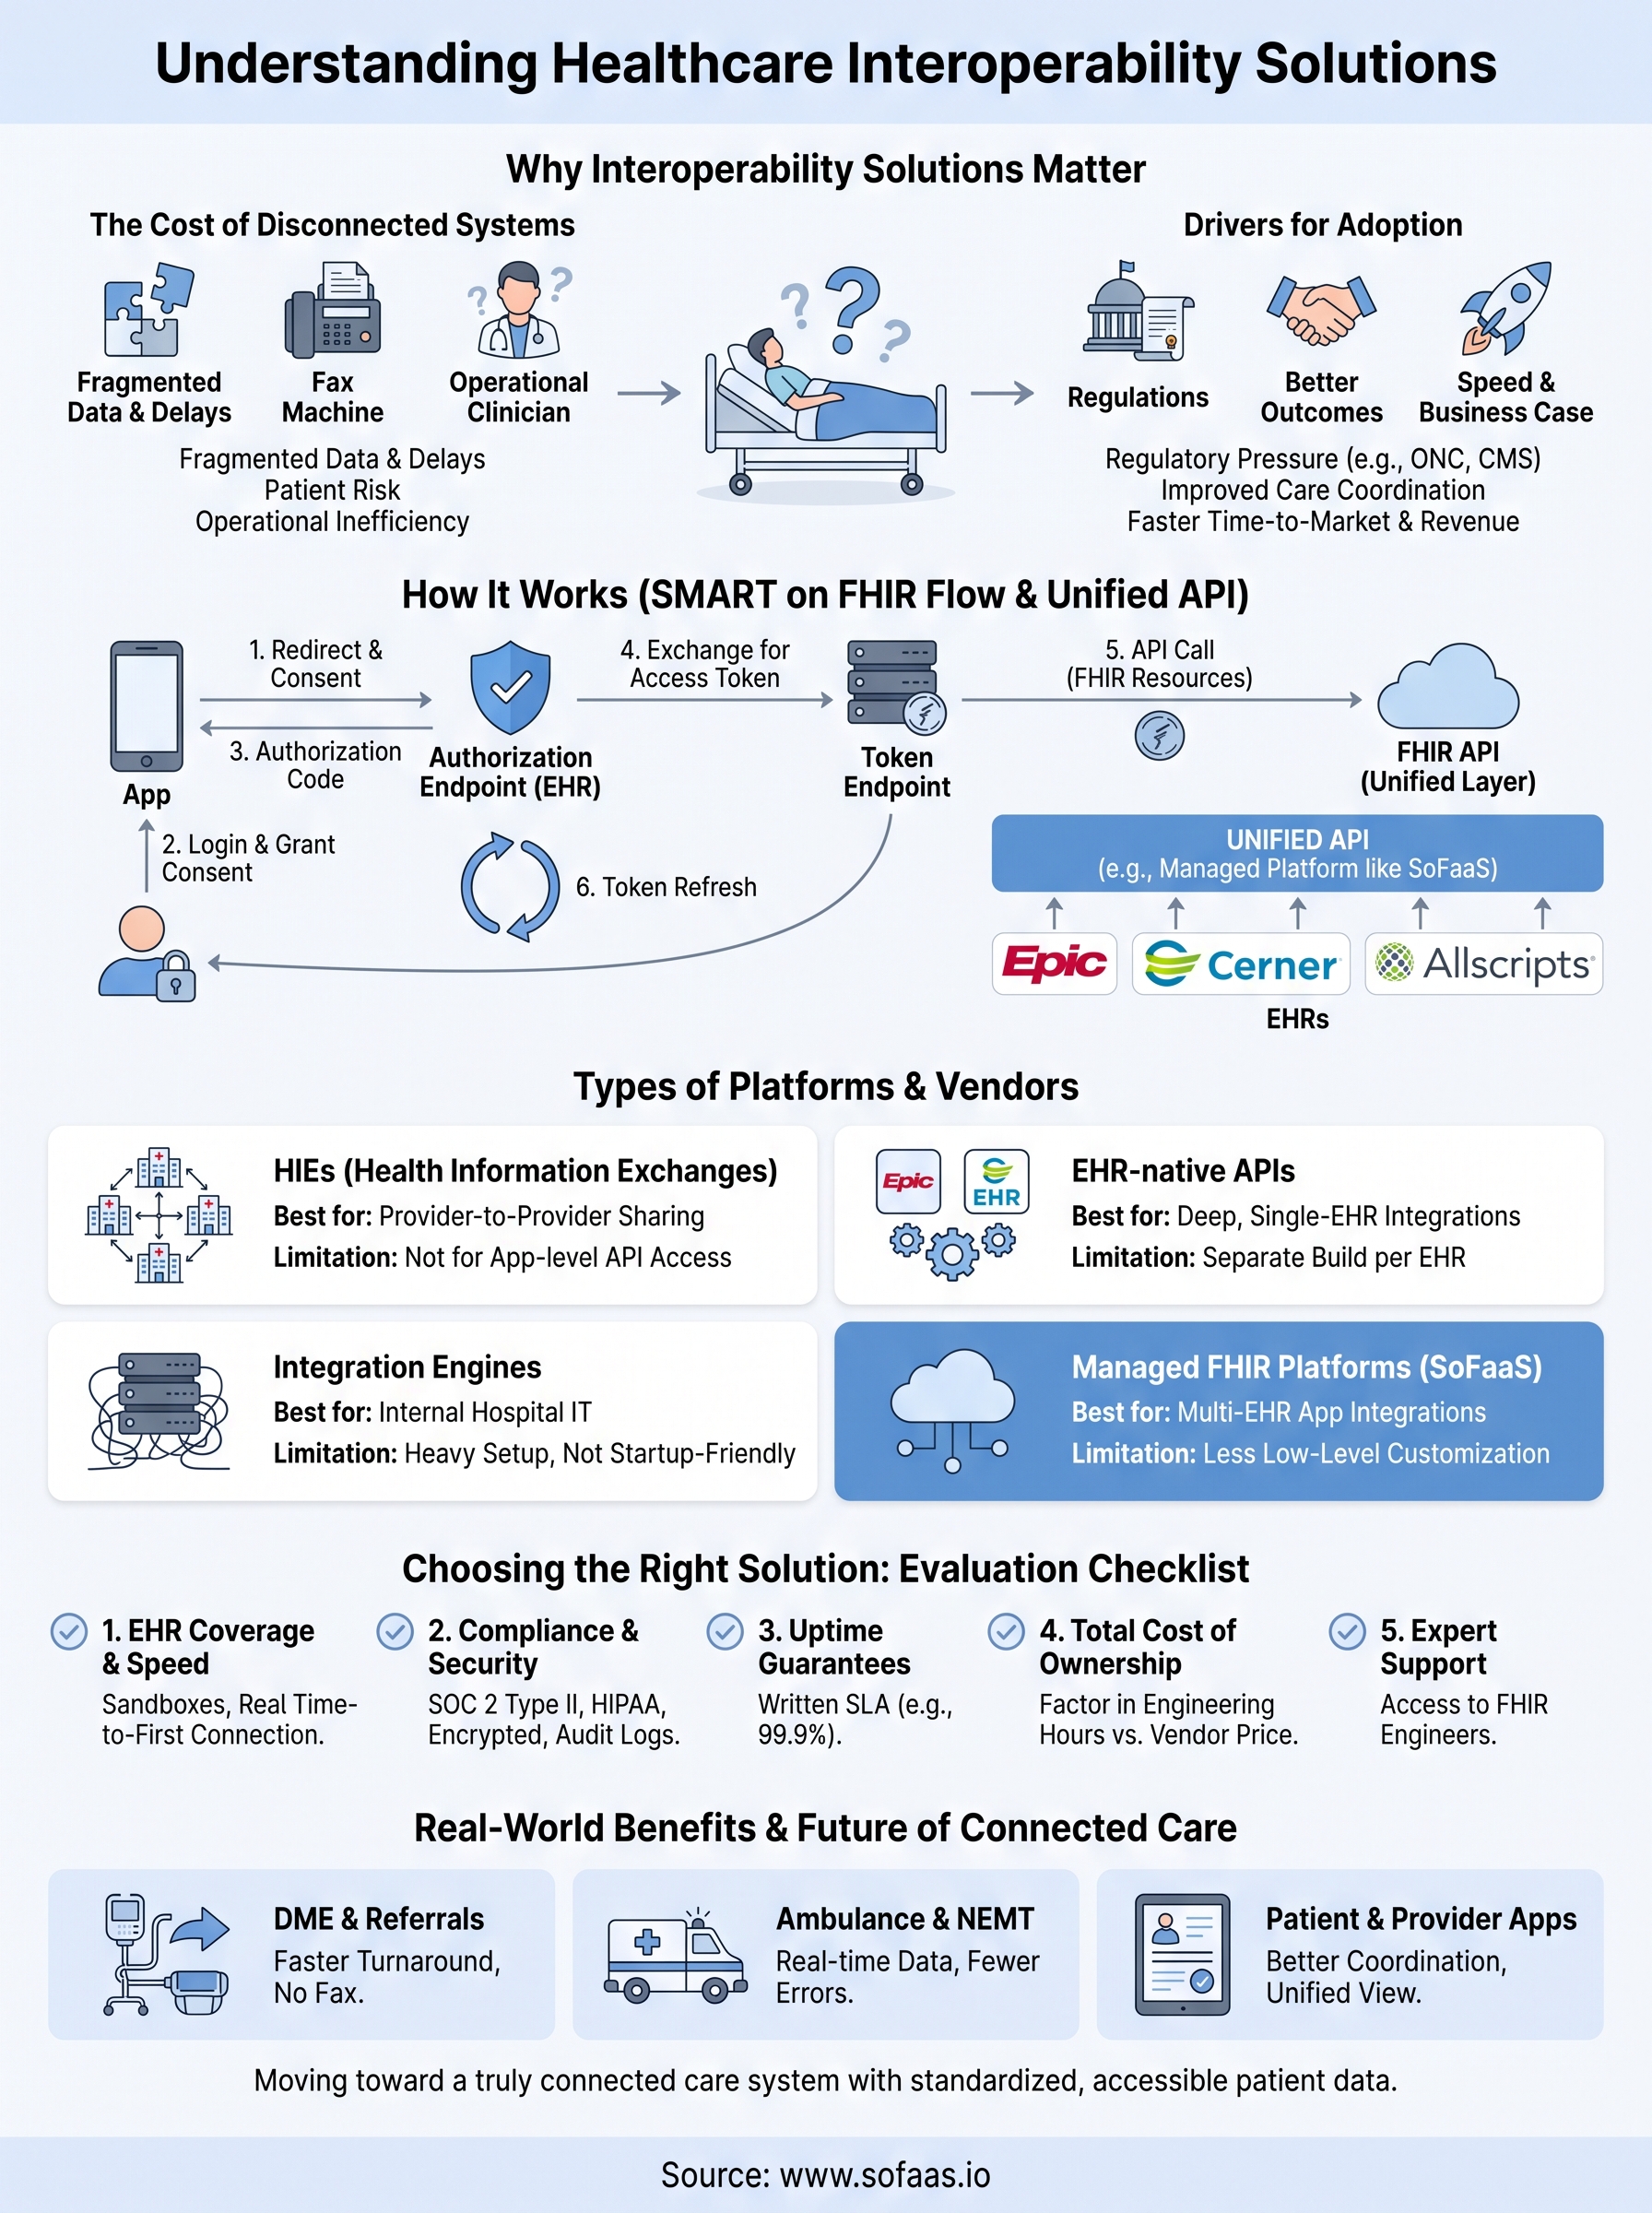
Moving toward a truly connected care system
Healthcare interoperability keeps moving from a compliance checkbox toward the baseline expectation for any application that touches patient data. The technology behind a working healthcare interoperability solution isn't mysterious anymore. FHIR structures the data, SMART on FHIR handles secure access, and a unified API removes the repeated grunt work of connecting to Epic, Cerner, and Allscripts one by one. What separates teams that ship fast from teams stuck rebuilding OAuth flows for months is simply which layer they choose to build on.
You don't need to become an EHR integration expert to compete in this space. You need a partner who already solved that problem and keeps it running while you focus on the product your customers actually asked for. If you're ready to stop wrestling with token refresh and start shipping, launch your SMART on FHIR app in a couple of steps.