Auth0 mTLS: How To Configure Client Auth And Sender Binding

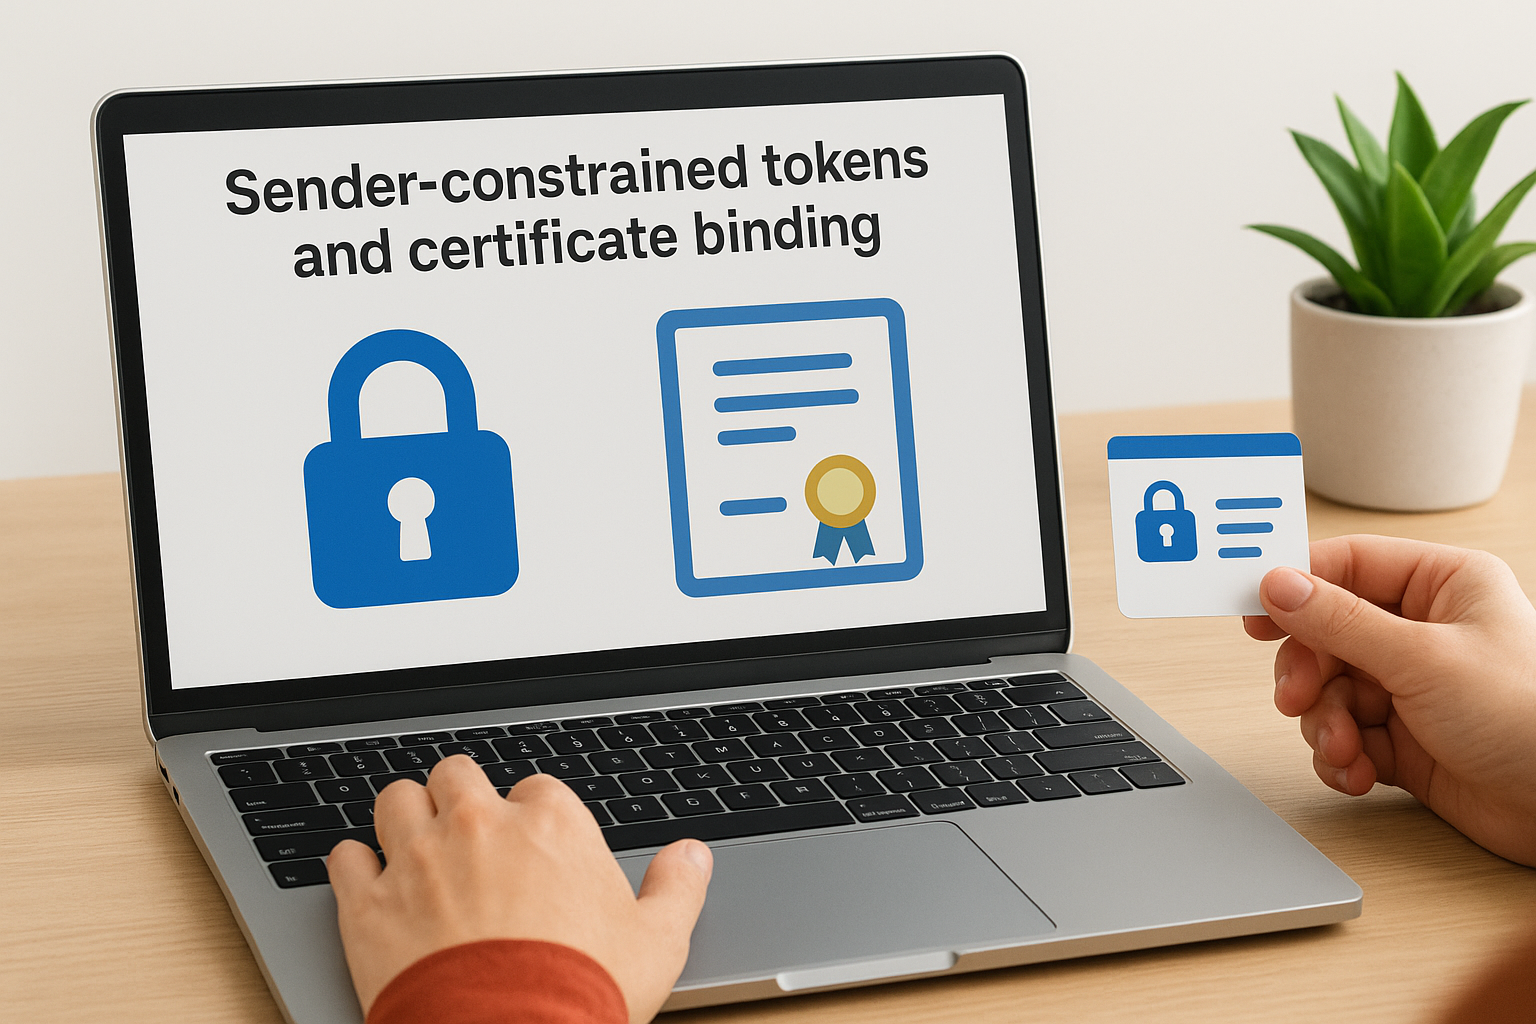
Standard OAuth 2.0 flows rely on client secrets, static credentials that can be stolen, leaked, or intercepted. Auth0 mTLS raises the bar by requiring both the client and the server to present valid certificates before a connection is established. For healthcare applications handling protected health information, this kind of mutual authentication isn't optional, it's the difference between checking a box and actually locking the door.
Mutual TLS adds cryptographic proof to every request. Instead of trusting a bearer token alone, the authorization server validates the client's identity through its certificate, and the client does the same in reverse. This is what makes sender-constrained tokens possible: tokens that are bound to a specific client certificate and become useless if intercepted by anyone else. For teams building against EHR systems where HIPAA and SOC 2 Type II compliance are table stakes, mTLS provides a measurable security upgrade over shared secrets.
At SoFaaS, we manage the OAuth and authorization layer for healthcare applications connecting to EHRs through SMART on FHIR. We deal with token management, consent flows, and enterprise security daily, so we know exactly where mTLS fits into the stack and where it creates friction. This guide walks you through configuring mTLS in Auth0 for client authentication and sender binding, from certificate setup to token endpoint configuration, so you can implement it correctly the first time.
What Auth0 mTLS does and when to use it
Auth0 mTLS works by requiring both parties in a connection to present valid X.509 certificates before any data is exchanged. The client sends its certificate during the TLS handshake, Auth0 validates it against a configured trust store, and only then does it issue tokens. This is fundamentally different from the standard OAuth 2.0 model, where a client proves its identity by sending a shared secret that could be copied out of a configuration file or captured in transit. With mutual TLS, the private key never leaves the client's environment, so there is nothing to steal from a credential store.
How mutual TLS differs from client secrets
Standard client authentication relies on a client_secret, a value your application sends to the token endpoint alongside its client_id. That secret works like a password: if someone obtains a copy, they can impersonate your application completely. mTLS eliminates that exposure by replacing the secret with a certificate-based proof of possession. The client holds a private key and presents the corresponding certificate; Auth0 checks that the certificate was signed by a trusted Certificate Authority (CA) and that the private key was used to complete the handshake.
The key distinction is that certificate-based auth is asymmetric and possession-bound. Your application's private key is never transmitted, only used locally to prove ownership of the certificate. Even if an attacker captures every byte of your TLS traffic, they cannot extract the private key or replay the handshake against a different server.
Mutual TLS is not just encryption in transit; it is cryptographic proof of client identity that persists for the lifetime of the connection.
When mTLS client auth makes sense
Not every application needs mTLS. You should reach for it when your system operates in a high-assurance environment where bearer tokens or shared secrets carry unacceptable risk. Healthcare applications connecting to EHR systems fall squarely in this category because they handle protected health information (PHI) and must satisfy HIPAA security requirements, and often SOC 2 Type II audit controls as well. Financial services, government portals, and any backend-to-backend communication where a compromised credential could expose sensitive data are similarly strong candidates.
You should also prioritize mTLS when you need sender-constrained tokens. A standard bearer token works for whoever holds it; a certificate-bound token only works for the client holding the matching private key. This matters in environments where tokens might be forwarded, logged, or exfiltrated through a compromised service.
Sender-constrained tokens and certificate binding
When Auth0 issues a certificate-bound access token, it embeds a thumbprint of the client's certificate into the token itself, following the OAuth 2.0 Mutual-TLS Client Authentication RFC 8705 standard. Any resource server that validates the token can then check that the thumbprint in the token matches the certificate the client presented during the request. If the client cannot prove it holds the private key for that certificate, the resource server rejects the token outright.
This mechanism is what makes sender-constrained tokens meaningfully different from standard bearer tokens in practice. A stolen bearer token is immediately usable by an attacker with no additional effort. A stolen certificate-bound token is not, because the attacker also needs the private key that was never transmitted across the wire. For teams implementing auth0 mtls in a healthcare or enterprise context, this combination of client authentication and token binding represents the highest level of assurance available within the OAuth 2.0 framework without adopting more complex protocols.
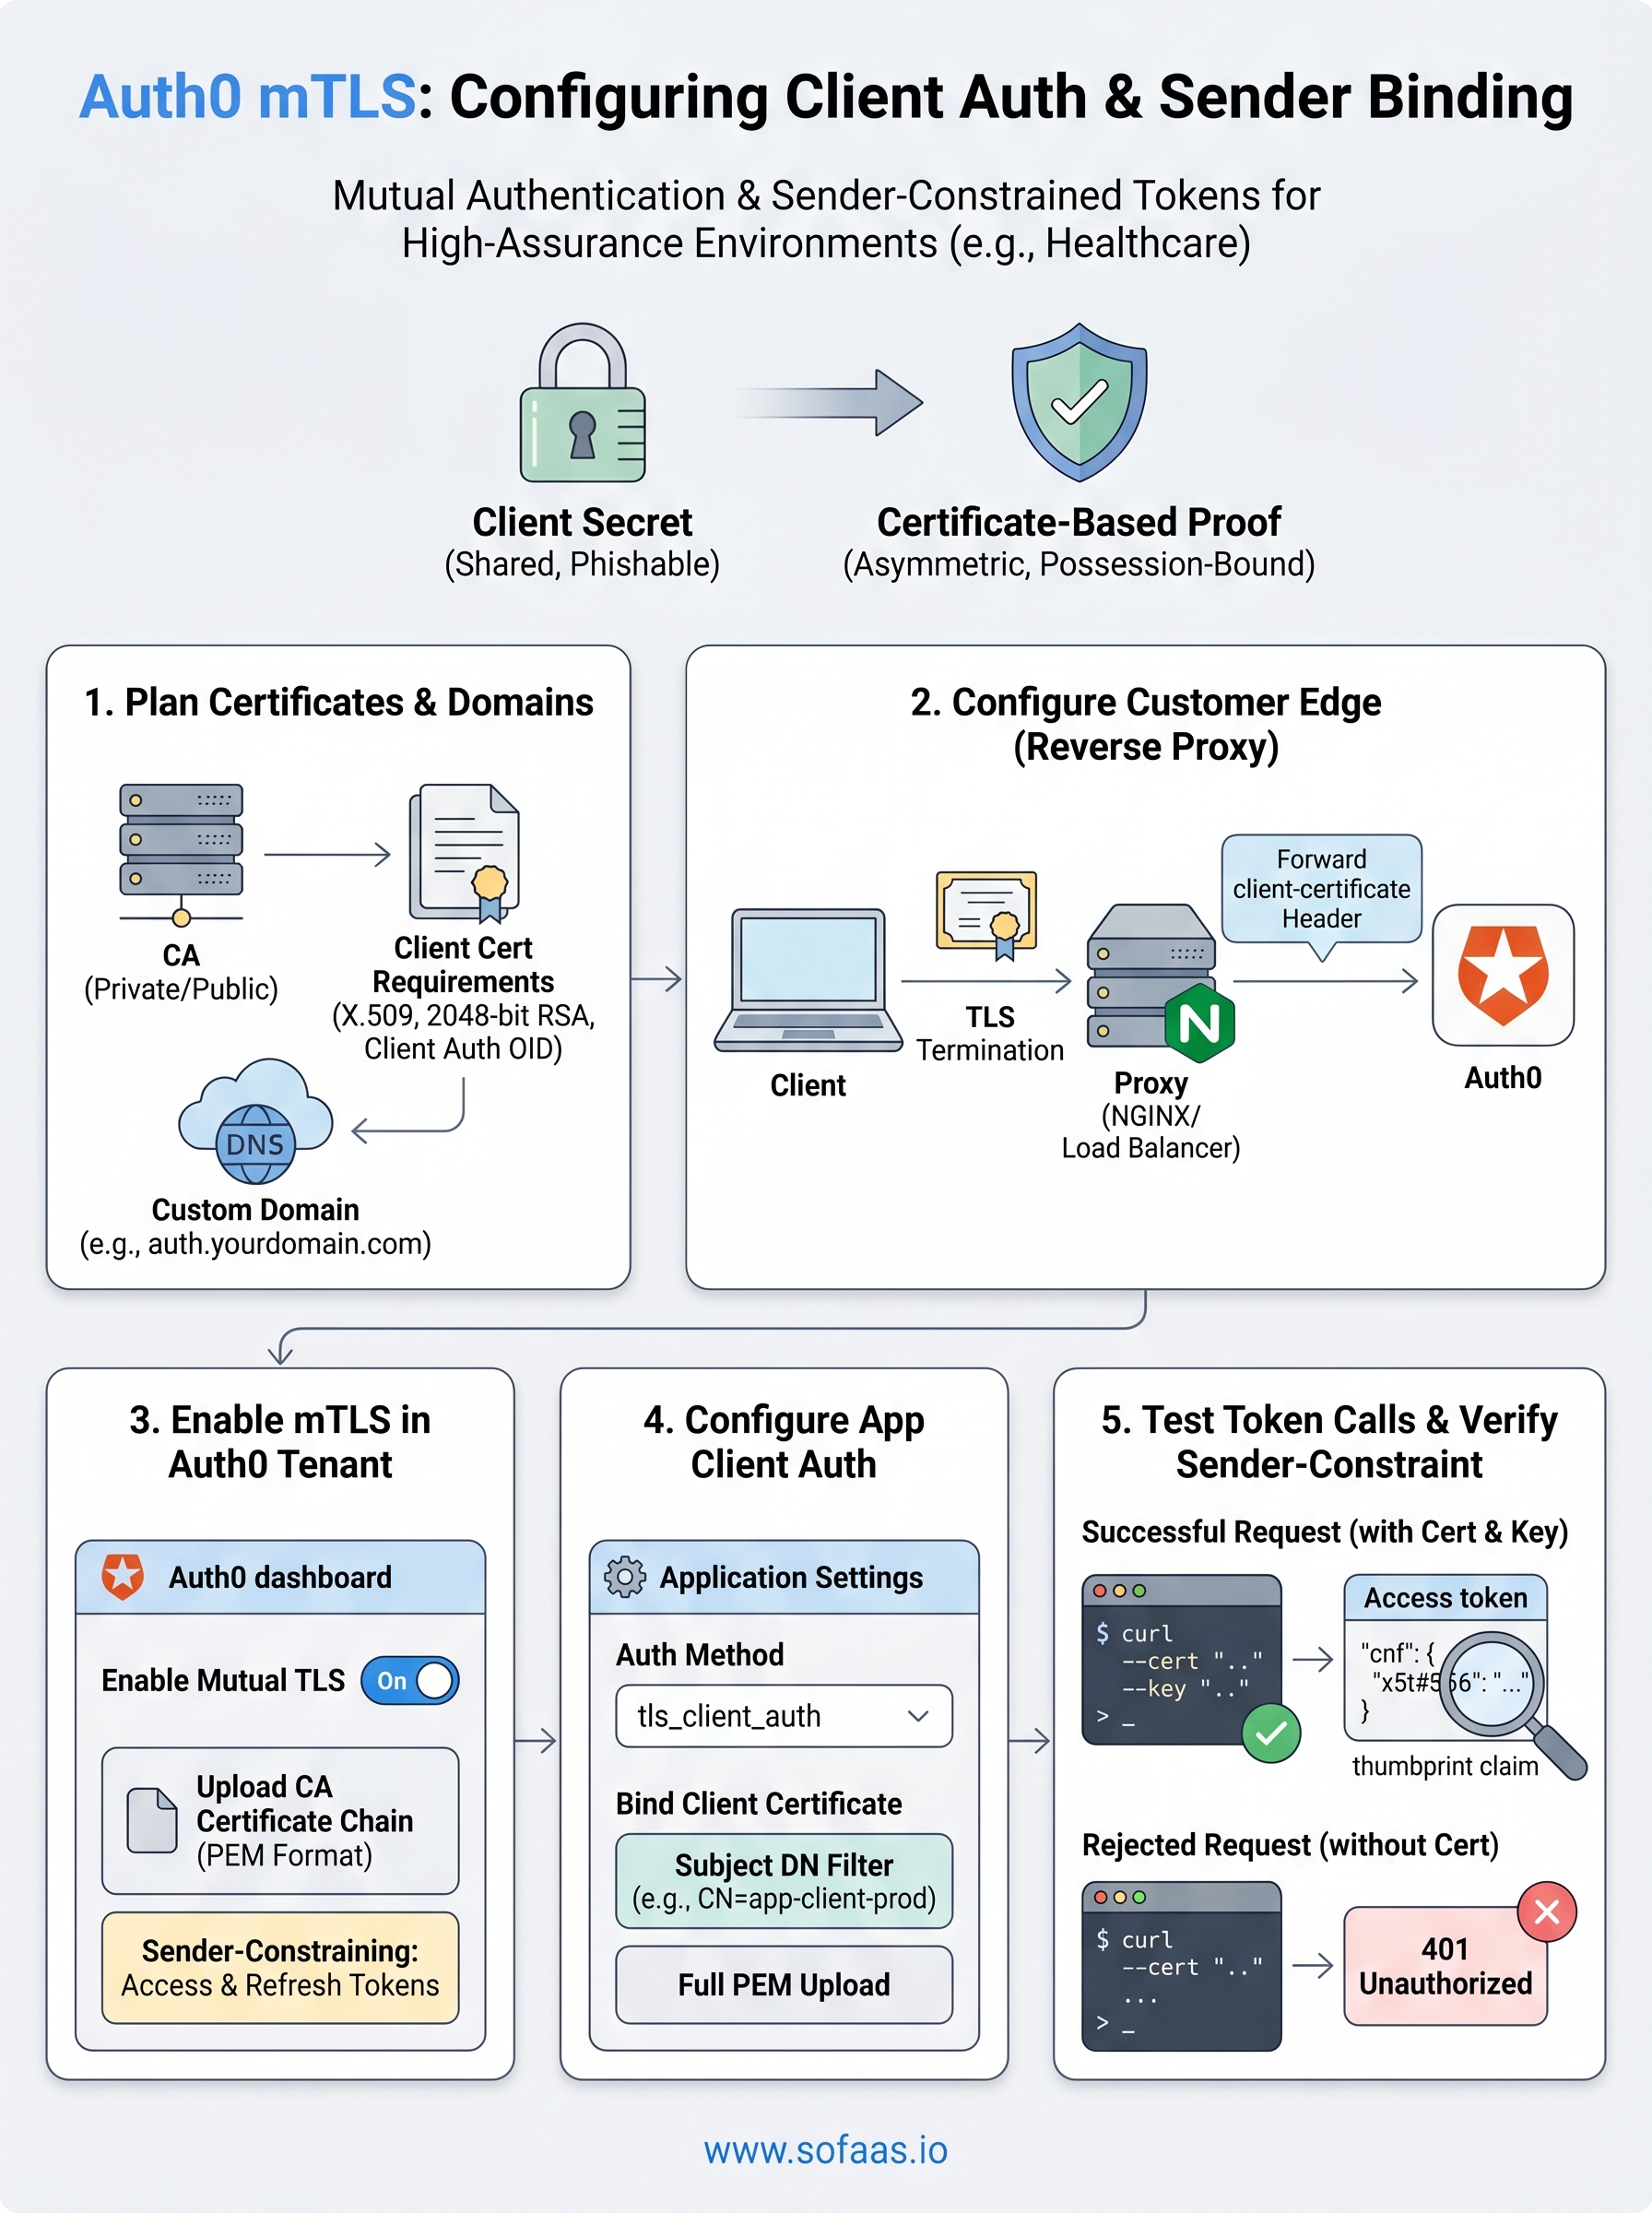
Step 1. Plan certificates, trust, and endpoint domains
Before you touch a single Auth0 setting, you need a clear picture of your certificate infrastructure and how it maps to your Auth0 tenant's endpoints. Skipping this planning phase leads to mismatched trust configurations, rejected handshakes, and debugging sessions that are difficult to trace back to their source. Auth0 mTLS requires you to decide upfront which Certificate Authority (CA) will issue client certificates, how you will manage certificate lifecycle, and what domain your mTLS-enabled token endpoint will run under.
Choose your CA and certificate strategy
Your first decision is whether to use a private CA (managed internally or through a cloud provider like AWS Private CA), a public CA, or self-signed certificates. For production healthcare environments, a private CA gives you full control over issuance and revocation without exposing your trust chain to the public internet. Self-signed certificates work for local testing but should never reach production because they carry no third-party validation and complicate audit evidence.
A private CA gives you full control over certificate issuance, revocation, and lifecycle without exposing your trust chain to external validation requirements.
Your client certificates must meet specific requirements before Auth0 will accept them:
- Format: X.509 v3, PEM-encoded
- Key type: RSA 2048-bit minimum or ECDSA P-256/P-384
- Extended Key Usage: Client Authentication (OID 1.3.6.1.5.5.7.3.2)
- Subject: Must contain a value Auth0 can use to identify the client, such as a CN or SAN
- Validity period: Keep it short; 90-day certificates with automated renewal reduce your exposure window if a certificate is ever compromised
Map your endpoint domains
Auth0 requires a custom domain to expose the mTLS token endpoint. The standard tenant.auth0.com domain does not support mTLS connections because Auth0 needs a dedicated edge to terminate TLS with client certificate validation before traffic reaches the authorization server. You will configure this edge in the next step, but your domain planning happens now.
Pick a subdomain you control and can issue a valid TLS server certificate for, such as auth.yourdomain.com. Confirm that your DNS provider supports the CNAME or A-record changes Auth0's custom domain setup requires, then document the following before you open the Auth0 dashboard:
| Item | Example value |
|---|---|
| Custom domain | auth.yourdomain.com |
| CA certificate file | ca-chain.pem |
| Client cert CN pattern | app-client-prod |
| DNS provider | Route 53, Cloudflare, Azure DNS |
Having these values ready before configuration keeps each step linear and eliminates the mismatches between certificates and trust store entries that cause the most time-consuming failures.
Step 2. Configure the customer edge for mTLS
The customer edge is the reverse proxy layer that sits in front of your Auth0 tenant and handles TLS termination. Auth0 does not terminate mTLS connections directly on tenant.auth0.com; instead, it expects a custom domain backed by an edge you control, where client certificates are validated and then forwarded to Auth0 as HTTP headers. Setting this up correctly is the foundation everything else depends on.
Set up a custom domain in Auth0
Before you configure the edge itself, your Auth0 tenant needs a custom domain registered. Log into the Auth0 dashboard, navigate to Branding > Custom Domains, and add the subdomain you chose during planning (for example, auth.yourdomain.com). Auth0 will give you a verification record to add to your DNS, typically a TXT record. Once DNS propagation completes and Auth0 verifies ownership, the custom domain becomes active.
A custom domain is a hard requirement for auth0 mtls; the standard Auth0 domain will reject mTLS handshakes regardless of your other configuration.
After verification, Auth0 also provides an origin server address (a CNAME like your-tenant.edge.tenants.auth0.com) that your reverse proxy will forward traffic to once it terminates TLS at the edge.
Configure certificate forwarding at the edge
Your reverse proxy, whether that is NGINX, Caddy, or a cloud load balancer like AWS ALB or Azure Application Gateway, must do two things: require a client certificate during the TLS handshake, and forward that certificate to Auth0 using the client-certificate HTTP header. Auth0 reads this header to extract the client identity.

Here is a minimal NGINX configuration that terminates mTLS and forwards the certificate:
server {
    listen 443 ssl;
    server_name auth.yourdomain.com;

    ssl_certificate     /etc/ssl/server.crt;
    ssl_certificate_key /etc/ssl/server.key;

    ssl_client_certificate /etc/ssl/ca-chain.pem;
    ssl_verify_client      on;
    ssl_verify_depth       3;

    location / {
        proxy_pass https://your-tenant.edge.tenants.auth0.com;
        proxy_set_header Host auth.yourdomain.com;
        proxy_set_header client-certificate $ssl_client_escaped_cert;
    }
}
ssl_client_certificate points to your CA chain PEM file from Step 1. The $ssl_client_escaped_cert variable contains the URL-encoded client certificate that Auth0 expects in the client-certificate header. Verify that your NGINX version is 1.19 or later, as older versions do not expose this variable correctly.
Test the edge configuration by sending a request with a valid client certificate and confirming that the forwarded header arrives at the Auth0 origin with the full certificate content intact before moving to the next step.
Step 3. Enable mTLS settings for the Auth0 tenant
With your edge forwarding client certificates correctly, you can now tell your Auth0 tenant to expect and validate them. This step activates mTLS at the tenant level through the Auth0 dashboard and confirms that the token endpoint will accept certificate-based client authentication. Until you complete this step, Auth0 ignores the client-certificate header your edge sends, regardless of how well the proxy is configured.
Turn on mTLS in the Auth0 dashboard
Log into your Auth0 dashboard and navigate to Security > Auth0 mTLS. The toggle you need is labeled "Enable Mutual TLS," and it is off by default. Flip it on. Auth0 will then begin processing the client-certificate header forwarded from your edge for all token requests that pass through your custom domain.
Enabling mTLS at the tenant level does not automatically enforce it on existing applications; you still configure certificate auth per application in Step 4.
After you enable the setting, Auth0 shows a confirmation field where you can specify whether sender-constraining should apply to access tokens only or to both access tokens and refresh tokens. For healthcare environments handling protected health information, constraining both token types reduces the risk surface if any token is forwarded or captured.
Upload your CA certificate to Auth0
Auth0 needs your CA certificate chain to validate client certificates presented at the token endpoint. In the same mTLS configuration panel, locate the "CA Certificates" section and upload your CA chain in PEM format. If you use an intermediate CA, include both the intermediate and root certificates concatenated in a single file.
The upload field accepts one or more PEM blocks. Here is the expected format for a two-level chain:
-----BEGIN CERTIFICATE-----
<intermediate CA certificate content>
-----END CERTIFICATE-----
-----BEGIN CERTIFICATE-----
<root CA certificate content>
-----END CERTIFICATE-----
Once the file uploads successfully, Auth0 displays the subject and expiry date for each certificate in the chain. Confirm that the subject CN and validity dates match what you generated during your planning in Step 1. A mismatch here causes all client certificate validations to fail silently, returning a generic 401 Unauthorized response without a descriptive error.
Confirm tenant-level settings before moving on
Before advancing to application-level configuration, verify these three tenant settings are in place:
- mTLS toggle is set to enabled
- Your custom domain shows as active and verified
- At least one CA certificate is uploaded with a valid expiry date
Running this checklist now saves you from chasing application-level errors that actually originate in missing tenant configuration when you reach auth0 mtls client auth setup in the next step.
Step 4. Configure mTLS client auth for an Auth0 app
Tenant-level mTLS is now active, but each application still needs explicit configuration before Auth0 will accept client certificates from it. This step walks you through enabling certificate-based authentication on a specific Auth0 application and wiring it to the client certificate your edge forwards. Without this per-application setting, token requests will fall back to standard client secret validation even when a valid certificate is present in the header.
Enable certificate-based auth on the application
Open your Auth0 dashboard, navigate to Applications > Applications, and select the application you want to configure. In the application settings, open the "Credentials" tab. You will see a field labeled "Authentication Method." Change this value from client_secret_post or client_secret_basic to tls_client_auth. This tells Auth0 that the application will authenticate using a certificate rather than a shared secret.
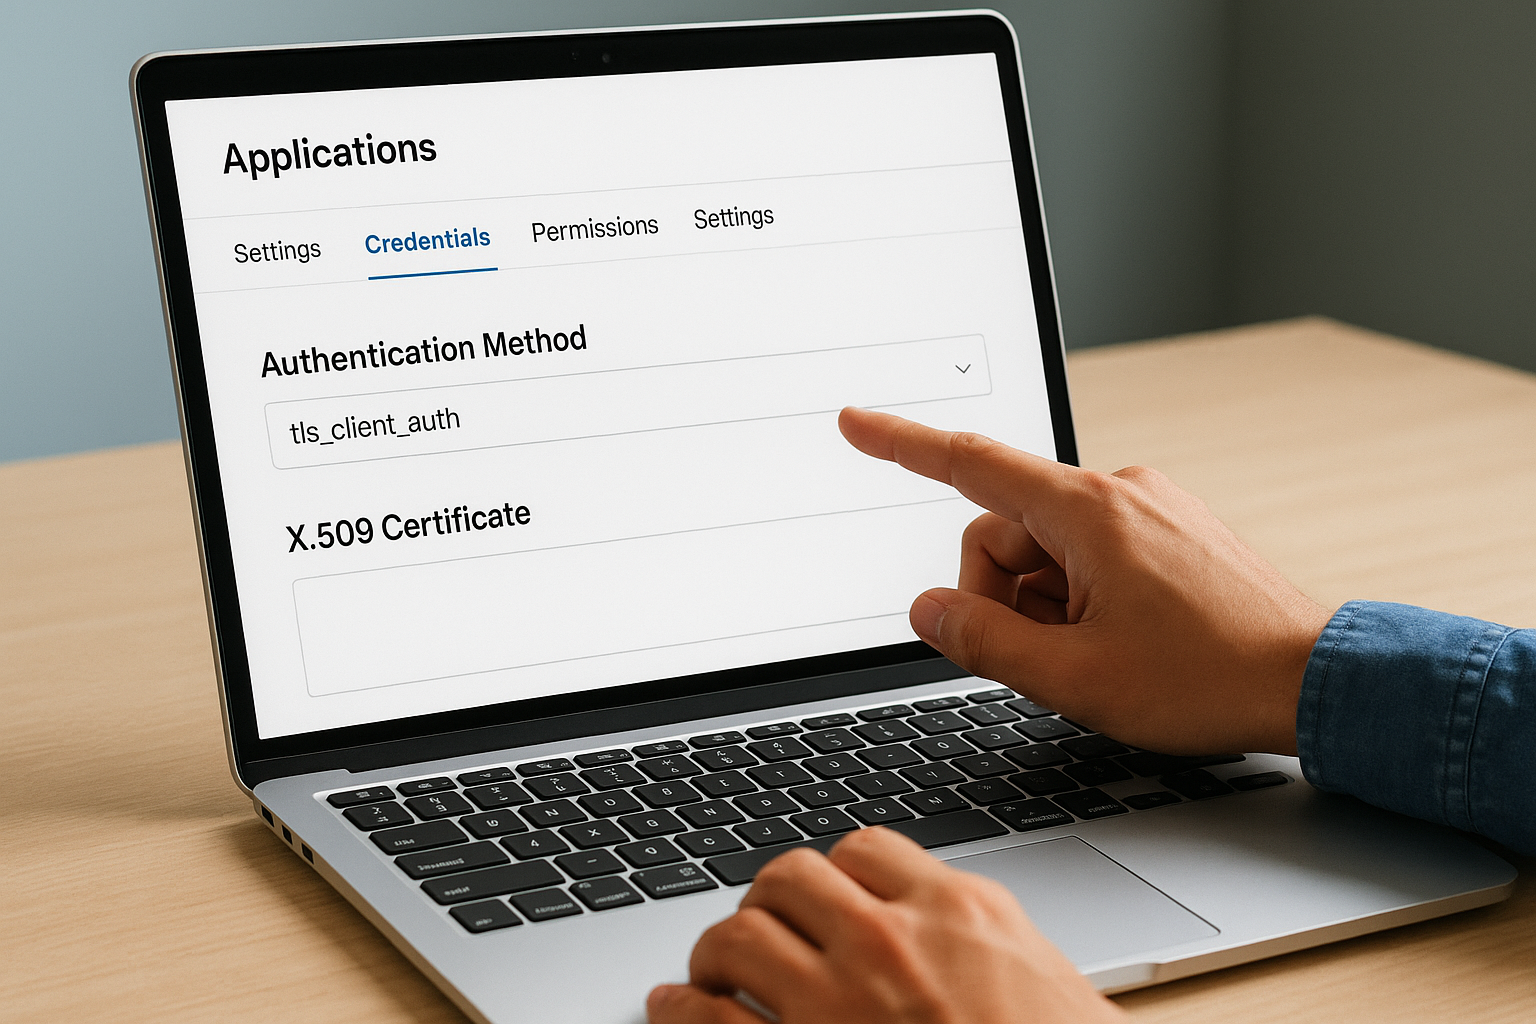
Once you set the authentication method to
tls_client_auth, Auth0 ignores anyclient_secretvalues sent in token requests from that application.
After saving this change, a new section labeled "X.509 Certificate" appears on the Credentials tab. This is where you bind a specific client certificate, or a set of certificate attributes, to the application so Auth0 can match incoming certificates to the right client.
Bind the client certificate to the application
Auth0 supports two methods for certificate binding: you can upload the full PEM-encoded client certificate, or you can specify a Subject DN filter that matches the certificate's subject fields. The subject DN approach is more flexible for environments that issue multiple certificates to the same application over time, such as when you rotate certificates on a 90-day cycle.
To bind by subject DN, enter the certificate's subject in the format Auth0 expects:
CN=app-client-prod,O=YourOrg,C=US
To bind by full certificate, paste the PEM block directly into the upload field:
-----BEGIN CERTIFICATE-----
<client certificate content>
-----END CERTIFICATE-----
Choose one method and save. Auth0 now uses the configured certificate or subject DN to validate incoming mTLS handshakes from this application against the CA trust store you uploaded in Step 3. If the certificate does not match either the uploaded PEM or the subject DN filter, Auth0 rejects the token request with a 401 and an invalid_client error code.
Once you confirm the binding is saved, your auth0 mtls application configuration is complete and ready for token endpoint testing in the next step.
Step 5. Test token calls and sender-constrain tokens
Your mTLS configuration is only as good as your ability to verify it works correctly end to end. This step walks you through sending a real token request with a client certificate, inspecting the resulting token for the certificate binding claim, and confirming that a request without the correct certificate fails as expected. Running all three checks before you ship to production is non-negotiable.
Send a test token request with a client certificate
Use curl to send a client credentials token request to your custom domain endpoint while presenting your client certificate and its corresponding private key. The --cert flag points to your client certificate file, and --key points to the private key. Both must be in PEM format.
curl --cert client.crt \
     --key client.key \
     --request POST \
     "https://auth.yourdomain.com/oauth/token" \
     --header "Content-Type: application/x-www-form-urlencoded" \
     --data "grant_type=client_credentials" \
     --data "client_id=YOUR_CLIENT_ID" \
     --data "audience=YOUR_API_AUDIENCE"
A successful response returns a JSON object containing access_token, token_type, and expires_in. If you receive a 401 invalid_client error instead, verify that the certificate subject DN matches what you configured in Step 4, and confirm that your CA chain in Auth0 matches the CA that signed the client certificate.
Verify sender-constrained token claims
Decode the access token using jwt.io or a local JWT library. Inside the token payload, look for the cnf claim containing a x5t#S256 value. This is the SHA-256 thumbprint of the client certificate Auth0 bound to the token during issuance.
{
  "cnf": {
    "x5t#S256": "bwcK0esc3ACC3DB2Y5_lESsXE8o9ltc05O89jdN-dg2"
  }
}
If the
cnfclaim is absent from the token, return to Step 3 and confirm that sender-constraining is enabled for access tokens at the tenant level.
The thumbprint in cnf must match the SHA-256 hash of the client certificate you presented during the token request. Any resource server you control can validate this binding by computing the thumbprint of the certificate the caller presents and comparing it to the value inside the token.
Confirm token rejection without the correct certificate
Send the same token request again, this time without the --cert and --key flags. Auth0 should return a 401 unauthorized response because the client-certificate header your edge forwards will be empty. This test confirms that your auth0 mtls setup enforces certificate auth rather than silently falling back to an unauthenticated flow. If the token endpoint still issues a token without a certificate, revisit your edge configuration and confirm that ssl_verify_client is set to on and not optional.
Key takeaways and next steps
You now have a complete path from certificate planning through sender-constrained token verification for auth0 mtls. The five steps in this guide cover the decisions that break most implementations: choosing the right CA, configuring the customer edge to forward certificates correctly, enabling tenant-level mTLS, binding certificates at the application level, and confirming that tokens carry the cnf claim and reject requests without a valid certificate.
For healthcare applications connecting to EHR systems, this configuration gives you cryptographic client authentication without relying on shared secrets that can be leaked or rotated incorrectly. Your tokens become bound to a specific certificate, which means a captured token is worthless to anyone who does not also hold the matching private key.
If you are building a SMART on FHIR application and want to skip the OAuth infrastructure complexity entirely, see how SoFaaS handles secure EHR integration so you can focus on your application instead.
The Future of Patient Logistics
Exploring the future of all things related to patient logistics, technology and how AI is going to re-shape the way we deliver care.
Thank you! Your submission has been received!
Oops! Something went wrong while submitting the form.