Traefik mTLS: Step-by-Step Setup, TLS Options, And Testing

Securing service-to-service communication is non-negotiable when you're handling sensitive data, especially in healthcare. Traefik mTLS (mutual TLS) solves a specific problem: it forces both the client and the server to authenticate each other before any data moves between them. No trust assumptions. No one-sided handshakes.
At SoFaaS, we build managed infrastructure for SMART on FHIR integrations that connect healthcare applications to EHRs like Epic, Cerner, and Allscripts. Every layer of that stack has to meet HIPAA and SOC 2 Type II requirements, which means mutual TLS isn't optional for us, it's foundational. We've configured and troubleshot Traefik's mTLS setup across production environments handling real patient data, and this guide reflects what we've learned doing that work.
This article walks you through the full process: generating certificates, configuring Traefik's TLS options, setting client authentication policies, and testing your mTLS setup end to end. Whether you're locking down a healthcare API gateway or securing internal microservices, you'll leave with a working configuration and a clear understanding of how each piece fits together.
mTLS in Traefik and what you need
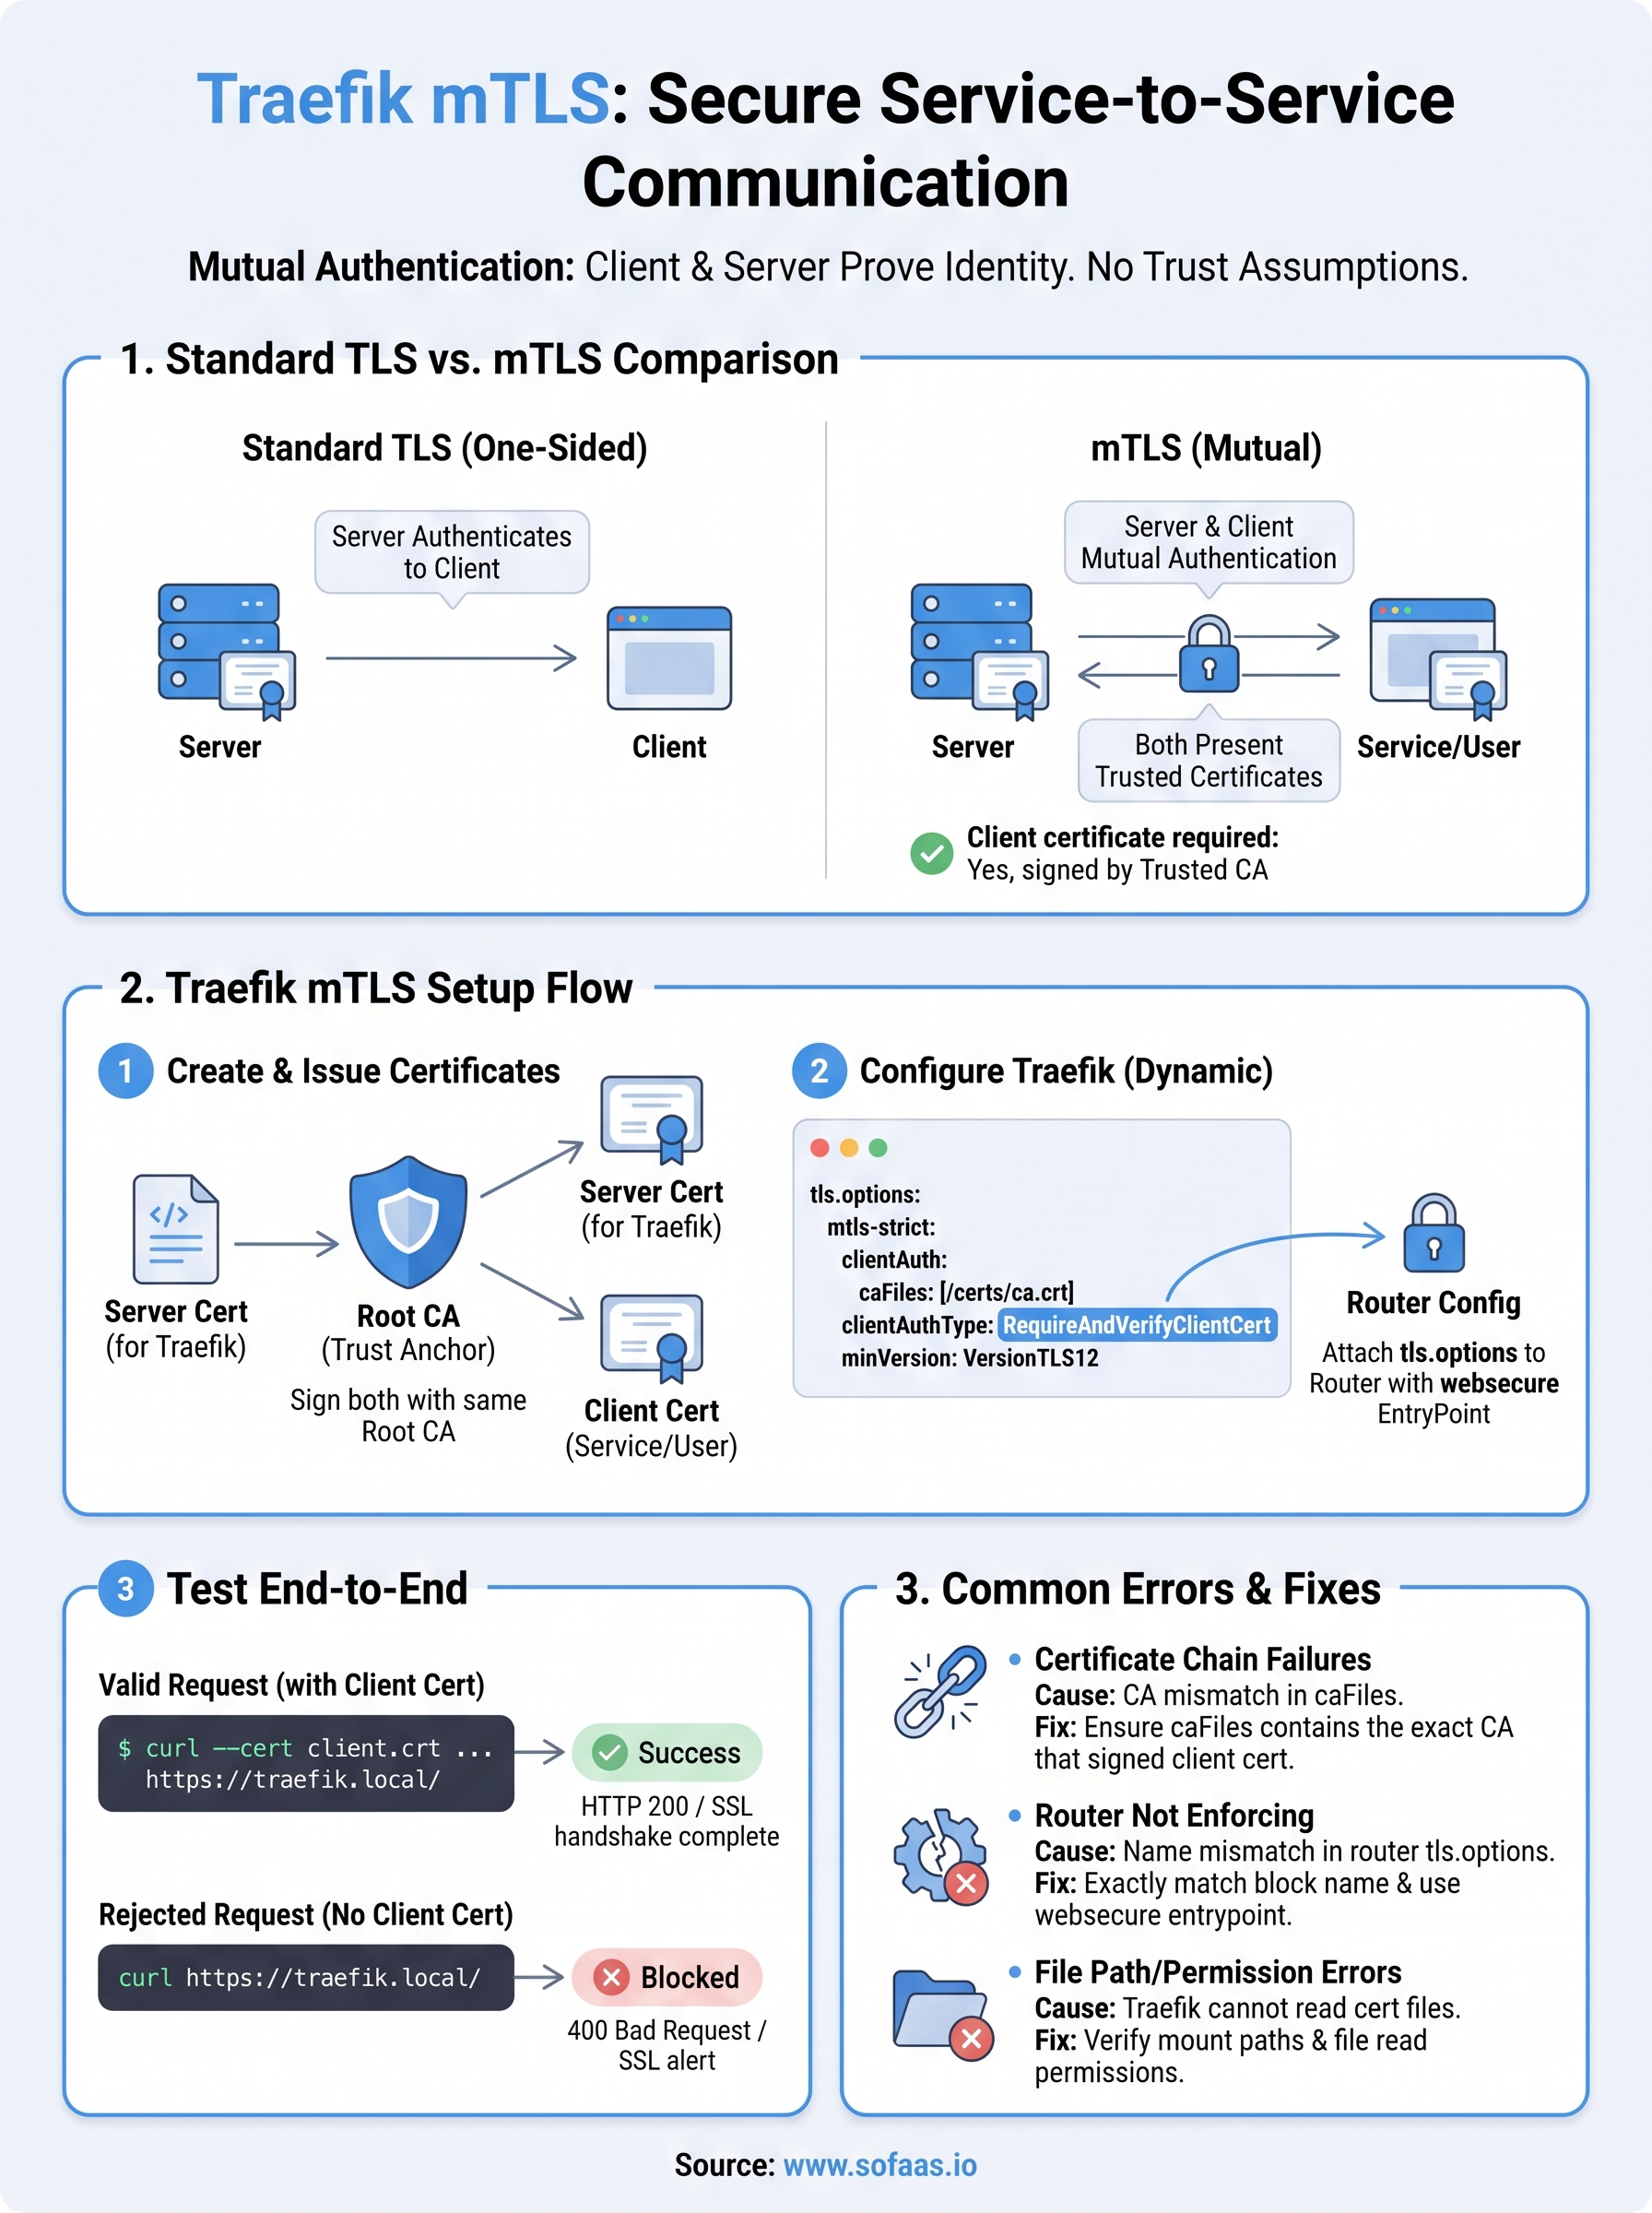
Standard TLS authenticates the server to the client. The client checks the server's certificate against a trusted Certificate Authority (CA), verifies it, and proceeds. Mutual TLS adds a second layer: the server also demands a certificate from the client and refuses the connection if that certificate isn't valid or isn't signed by a CA it trusts. In Traefik, you configure this behavior through tls.options in your dynamic configuration, then attach those options to specific routers or entrypoints.
Traefik mTLS enforcement happens at the TLS handshake level, before any application-layer request ever reaches your backend service.
How mTLS differs from standard TLS
The table below shows the key differences between standard TLS and mTLS so you can see exactly what changes in your setup before you touch any configuration files.
| Aspect | Standard TLS | mTLS |
|---|---|---|
| Server presents certificate | Yes | Yes |
| Client presents certificate | No | Yes |
| Mutual authentication | No | Yes |
| Typical use case | Public web traffic | Service-to-service, API gateways |
| Client certificate required | No | Yes, signed by a trusted CA |
Standard TLS is sufficient for most public-facing sites, where the client is a browser and identity is managed at the application layer. mTLS is the right choice when you control both ends of the connection, for example when a healthcare application calls your API gateway and you need cryptographic proof of the client's identity before processing any request.
What Traefik needs to enforce mTLS
Traefik splits its configuration into static configuration (startup settings like entrypoints and providers) and dynamic configuration (runtime settings like routers, services, and TLS options). mTLS lives in the dynamic configuration. You define a named tls.options block that references your CA certificate and sets clientAuth.clientAuthType, then reference that block from your router.
The clientAuthType field accepts four values, and picking the wrong one is a common setup mistake:
NoClientCert- no client certificate is requested (default, no mTLS)RequestClientCert- requests a certificate but does not require oneRequireAnyClientCert- requires a certificate but skips CA validationRequireAndVerifyClientCert- requires a certificate and verifies it against your specified CA (this is the option you want for real mTLS)
Prerequisites before you start
Before working through the steps in this guide, make sure you have the following ready:
- Traefik v2.x or v3.x running with a file or Kubernetes provider enabled
- OpenSSL installed locally to generate and sign certificates
- A root CA you control, which will sign both server and client certificates
- Access to Traefik's dynamic configuration files or CRDs if you're on Kubernetes
- A test backend service reachable from Traefik to verify the full handshake
Getting these prerequisites sorted before you start saves you from hitting certificate chain errors mid-configuration. Those chain errors are the most common source of frustration when setting up traefik mTLS for the first time, and they're almost always caused by a missing or mismatched CA reference in the tls.options block.
Step 1. Create a CA and issue certificates
Before you touch any Traefik configuration, you need a root CA and two certificates signed by it: one for the server and one for the client. Traefik validates the client certificate against the CA you provide, so both certificates must share the same CA trust chain or the handshake will fail immediately.
Generate the root CA
Run the following commands to create a self-signed root CA. You'll use this CA to sign both the server and client certificates, which is what allows Traefik to verify the client's identity during the mTLS handshake.
# Generate the CA private key
openssl genrsa -out ca.key 4096

# Generate the self-signed CA certificate (valid 3650 days)
openssl req -new -x509 -days 3650 -key ca.key \
  -subj "/CN=MyRootCA/O=MyOrg" \
  -out ca.crt
Keep
ca.keysecured and off any server that doesn't strictly need it. Anyone with the CA private key can issue certificates your infrastructure will trust.
Issue the server and client certificates
With your CA in place, generate the server certificate and the client certificate using the same signing flow. The server certificate goes to Traefik; the client certificate goes to whatever service or user calls your secured endpoint.
# Server certificate
openssl genrsa -out server.key 2048
openssl req -new -key server.key \
  -subj "/CN=traefik.local/O=MyOrg" \
  -out server.csr
openssl x509 -req -days 365 -in server.csr \
  -CA ca.crt -CAkey ca.key -CAcreateserial \
  -out server.crt

# Client certificate
openssl genrsa -out client.key 2048
openssl req -new -key client.key \
  -subj "/CN=myclient/O=MyOrg" \
  -out client.csr
openssl x509 -req -days 365 -in client.csr \
  -CA ca.crt -CAkey ca.key -CAcreateserial \
  -out client.crt
After running these commands, you'll have ca.crt, server.crt, server.key, client.crt, and client.key ready. These five files are everything the next step needs to configure traefik mTLS correctly.
Step 2. Configure Traefik for TLS and mTLS
With your certificates ready, you now wire them into Traefik's dynamic configuration. This step is where traefik mTLS actually gets enforced: you define a named TLS options block that points to your CA, set the client authentication type, then attach that block to a router so Traefik knows which endpoints require mutual authentication.
Define your TLS options block
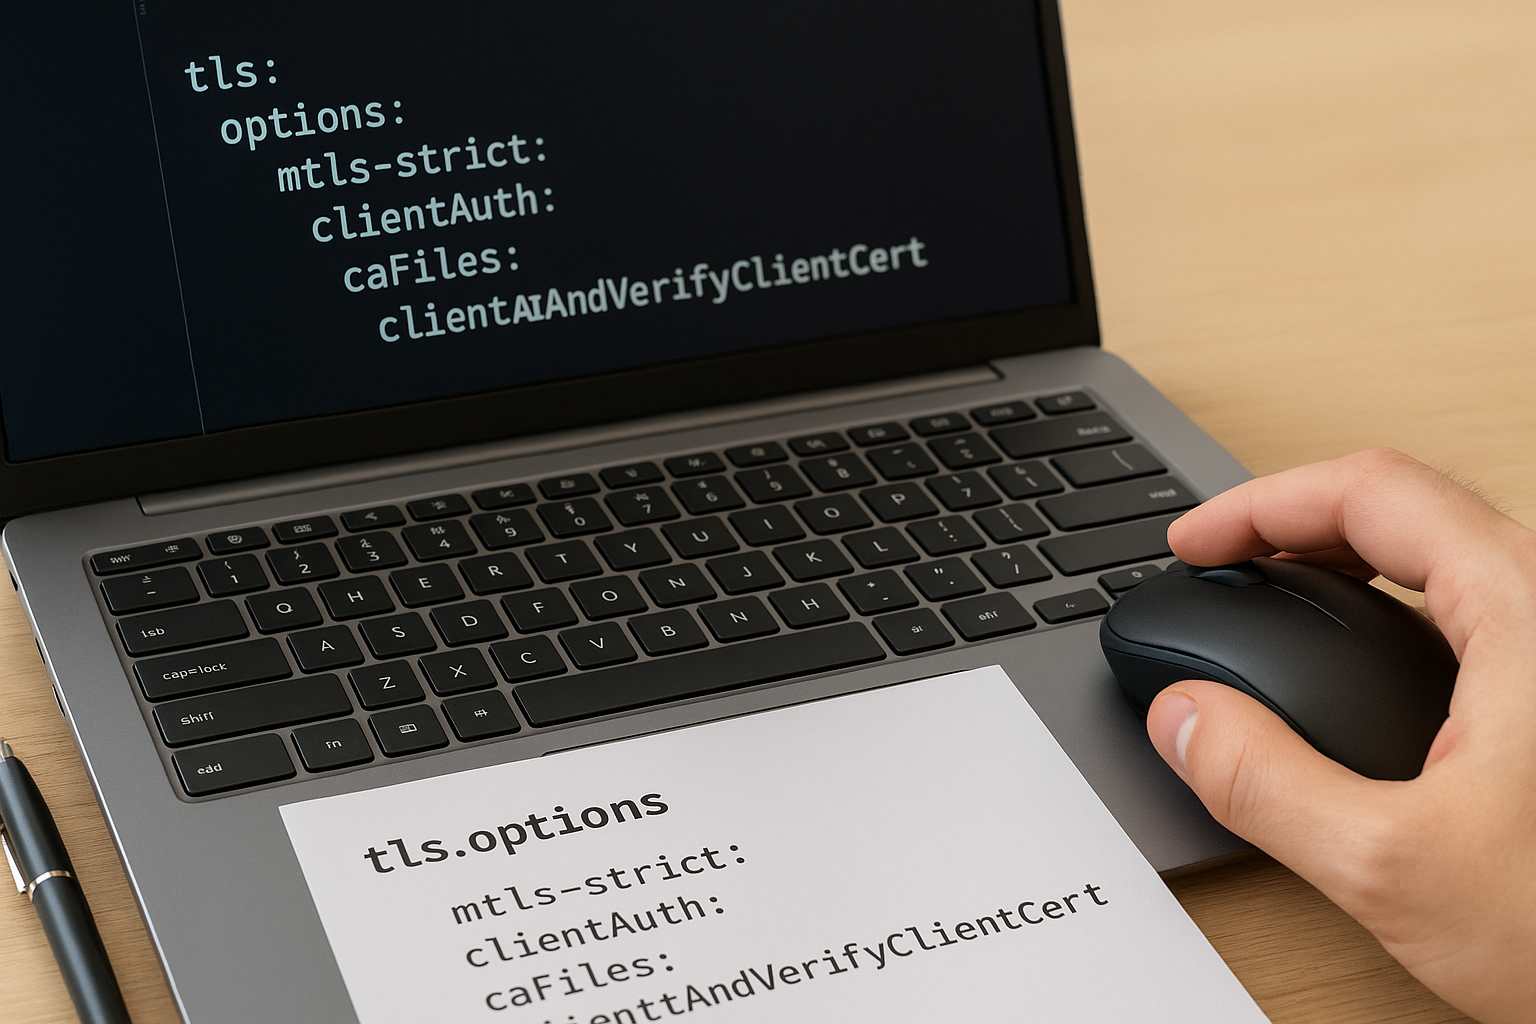
Your tls.options block is the core of the mTLS configuration. It tells Traefik which CA certificate to trust for client verification and which clientAuthType to apply. Create or update your dynamic configuration file (typically dynamic.yml) with the following:
tls:
  options:
    mtls-strict:
      clientAuth:
        caFiles:
          - /certs/ca.crt
        clientAuthType: RequireAndVerifyClientCert
      minVersion: VersionTLS12

  certificates:
    - certFile: /certs/server.crt
      keyFile: /certs/server.key
The caFiles field must point to the CA certificate you generated in Step 1, not the server certificate. The minVersion: VersionTLS12 setting is strongly recommended because TLS 1.0 and 1.1 have known vulnerabilities you should not expose in any environment that processes sensitive data.
If Traefik cannot read the CA file path at startup, it silently falls back to no client verification rather than throwing a hard error, so always confirm the file path is mounted and accessible.
Attach the TLS options to a router
Defining the TLS options block alone does nothing until you reference it from a router configuration. Add a tls.options field to the router that should enforce mTLS:
http:
  routers:
    my-secure-router:
      rule: "Host(`traefik.local`)"
      entryPoints:
        - websecure
      service: my-backend
      tls:
        options: mtls-strict
The value mtls-strict must exactly match the name you defined in the tls.options block. A mismatch here silently disables client certificate enforcement, which is one of the easiest mistakes to miss during initial setup.
Step 3. Test mTLS with curl and real clients
With your Traefik mTLS configuration in place, you need to confirm the handshake actually works before trusting this setup in production. Testing with curl gives you direct, repeatable verification of both the happy path and the rejection path, so you know the server accepts valid clients and blocks everything else.
Send a valid request with a client certificate
Start by verifying that a client presenting the correct certificate chain gets through. Pass the client certificate, client key, and CA certificate to curl using the flags below:
curl -v \
  --cert ./client.crt \
  --key ./client.key \
  --cacert ./ca.crt \
  https://traefik.local/
A successful mTLS handshake returns HTTP 200 (or whatever your backend responds with) and shows SSL connection using TLSv1.3 in the verbose output. Look for the line Server certificate followed by the subject matching your server.crt. If you see a 200, your certificates are correctly signed and Traefik is enforcing the handshake as expected.
Check the
curl -voutput for the line "client certificate" to confirm curl actually sent the certificate during the handshake, not just that the connection succeeded.
Confirm rejected requests without a certificate
Testing rejection is just as important as testing acceptance. Run the same request without the client certificate flags to confirm Traefik blocks it:
curl -v \
  --cacert ./ca.crt \
  https://traefik.local/
Traefik should close the connection during the TLS handshake with a 400 Bad Request or an SSL alert, depending on your Traefik version and the backend's error handling. You will not receive a 200. If you do get through without a client certificate, your clientAuthType is not set to RequireAndVerifyClientCert or the tls.options block is not attached to the router correctly. Go back to Step 2 and check the router's tls.options field matches your block name exactly.
Fix common Traefik mTLS errors
When traefik mTLS stops working, the failure usually comes from one of three sources: a broken certificate chain, a misconfigured router attachment, or an inaccessible certificate file path. Knowing which error maps to which cause saves you from reconfiguring everything at once.
Certificate chain validation failures
You'll see this error when the client certificate isn't signed by the CA you specified in caFiles. Traefik closes the handshake with a TLS alert, and curl -v shows SSL alert: certificate unknown or alert unknown ca. The fix is straightforward: confirm that the CA certificate in caFiles is the exact CA that signed the client certificate, not the server certificate or an intermediate CA that doesn't complete the chain.
If you're using an intermediate CA, include the full chain (root plus intermediate) in your
caFileslist, because Traefik does not automatically fetch missing chain certificates.
Router not enforcing client authentication
This is the silent failure. Your configuration looks correct, but clients without certificates still get through. The cause is almost always a name mismatch between the tls.options block name and the value referenced in the router's tls.options field. Check both entries for:
- Typos or capitalization differences
- Extra whitespace around the option name
- The router using a plaintext entrypoint instead of
websecure
TLS options have no effect on non-TLS entrypoints, so a router on port 80 will never enforce client authentication regardless of what you specify.
File path and permission errors
Traefik reads certificate files at runtime using the path you specify. If the path is wrong or file permissions deny the Traefik process read access, Traefik falls back silently rather than throwing a startup error. Run ls -la /certs/ inside the Traefik container to confirm the files exist, then check the Traefik logs for certificate-loading warnings. Mounting the certificate directory as a read-only volume in Docker or Kubernetes is the most reliable way to avoid permission issues without granting unnecessary access.
Next steps
You now have a working traefik mTLS setup: a CA-signed certificate chain, a RequireAndVerifyClientCert policy attached to your router, and verified rejection of clients without valid credentials. The configuration pattern you followed here scales directly to multi-service environments by creating separate client certificates for each service and referencing the same CA in your tls.options block.
Your next priority should be certificate rotation planning. The certificates you generated in Step 1 expire in 365 days, and a lapsed client certificate will break authenticated connections just as hard as a misconfiguration. Build a rotation schedule now, before your first production incident forces you to do it under pressure.
If you're building a healthcare application that needs secure, FHIR-compliant connections to EHR systems like Epic or Cerner without rebuilding integration infrastructure from scratch, see how SoFaaS handles that for you.
The Future of Patient Logistics
Exploring the future of all things related to patient logistics, technology and how AI is going to re-shape the way we deliver care.
Thank you! Your submission has been received!
Oops! Something went wrong while submitting the form.