GitLab CI/CD Secrets: Secure Storage And Injection Guide

Hardcoded API keys, database passwords, and tokens sitting in plain text inside your .gitlab-ci.yml file are a breach waiting to happen. If your pipeline handles anything remotely sensitive, especially in regulated industries like healthcare, getting GitLab CI/CD secrets management right isn't optional. It's foundational to your security posture.
At SoFaaS, we build and maintain a managed platform for SMART on FHIR integrations, connecting healthcare applications to EHR systems like Epic and Cerner. Every deployment we run touches HIPAA-regulated patient data, which means our CI/CD pipelines must treat credentials, tokens, and encryption keys with the same rigor we apply to the data itself. Poorly managed secrets in a pipeline can undermine even the strongest application-level security, and we've seen teams learn that lesson the hard way.
This guide walks you through how to securely store and inject secrets into GitLab CI/CD pipelines. You'll learn how to use GitLab's native CI/CD variables, configure protection and masking rules, integrate with external secret managers like HashiCorp Vault, and apply best practices that hold up under compliance audits. Whether you're shipping a healthcare app, a fintech product, or any software that handles sensitive credentials, the principles here apply directly.
What counts as a secret in GitLab CI/CD
Before you can protect your secrets, you need a clear definition of what qualifies as one. In the context of gitlab ci cd secrets, a secret is any value that, if exposed, could grant unauthorized access to a system, compromise user data, or violate a compliance requirement. The instinct to protect passwords is obvious, but the full scope of what counts as sensitive inside your pipelines is often wider than teams initially assume.
Credentials that authenticate systems and services
The most recognizable secrets are authentication credentials: usernames paired with passwords, API keys, and access tokens. These values let your pipeline interact with external services, and they're the first thing an attacker looks for if they gain access to your CI/CD environment. Common examples include:
- Database connection strings (PostgreSQL, MySQL, and MongoDB URIs that embed credentials)
- API keys for third-party services like Stripe, Twilio, or AWS
- OAuth tokens and refresh tokens used to call protected APIs
- Container registry passwords for pulling or pushing Docker images
- Webhook secrets used to verify inbound payloads from external platforms
If a value lets something prove it is allowed to act, treat it as a secret from day one.
Any of these values hardcoded in your .gitlab-ci.yml or in a script file tracked by Git becomes part of your repository history permanently, even if you delete the line later. Git history is persistent, and a leaked token stays exploitable until you rotate it.
Infrastructure and encryption keys
Beyond authentication credentials, your pipelines often handle cryptographic material that deserves the same level of protection. SSH private keys used to deploy to servers, TLS certificates and their private keys, and GPG signing keys all fall into this category. If your pipeline signs release artifacts, decrypts configuration files, or connects to production infrastructure over SSH, those keys are secrets.
Encryption keys used to protect data at rest are especially sensitive in regulated environments. In healthcare applications that touch patient data, exposing an encryption key does not just break authentication. It potentially exposes the protected health information the key was guarding. Treat any key that controls access to encrypted data with the same rigor you apply to your most sensitive credentials.
Configuration values that cross the line
Not every secret looks like a password. Some configuration values start as innocent-seeming settings but become secrets the moment they reveal something about your internal architecture or give leverage to an attacker. Internal service hostnames, database replica addresses, and environment-specific endpoint URLs can all be used for reconnaissance if they leak.
Your feature flag keys, internal API base URLs for private services, and Slack webhook URLs also belong in this category. A Slack webhook URL, for instance, lets anyone post messages to your channels if they get hold of it. The same logic applies to any value that provides privileged access or reveals non-public information about your infrastructure.
The practical test for deciding what to protect
The simplest filter you can apply is consequence-based: if exposing a value would force you to rotate it, audit access, or notify stakeholders, it's a secret. Apply this test during code reviews, onboarding checklists, and pipeline design sessions before a value ever touches your repository.
When in doubt, err toward treating a value as sensitive. The cost of over-protecting a configuration value is minimal. The cost of under-protecting a credential, especially in an environment handling regulated data, can include breach disclosure, compliance penalties, and complete loss of customer trust.
Step 1. Store secrets in GitLab CI/CD variables
GitLab's built-in CI/CD variables are your first line of defense for keeping sensitive values out of your codebase. Instead of hardcoding credentials in .gitlab-ci.yml, you store them in GitLab's encrypted variable store, and the runner injects them into each job at runtime. This approach keeps secrets fully decoupled from your source code and out of your repository history entirely.
Add variables through the GitLab UI
You can add variables at three levels: the project, the group, or the instance. For most teams, project-level variables are the right starting point. Navigate to your project, then go to Settings > CI/CD > Variables and click "Add variable." Give each variable a descriptive name in uppercase with underscores, such as DATABASE_URL or AWS_SECRET_ACCESS_KEY. GitLab encrypts the value at rest automatically once you save it.
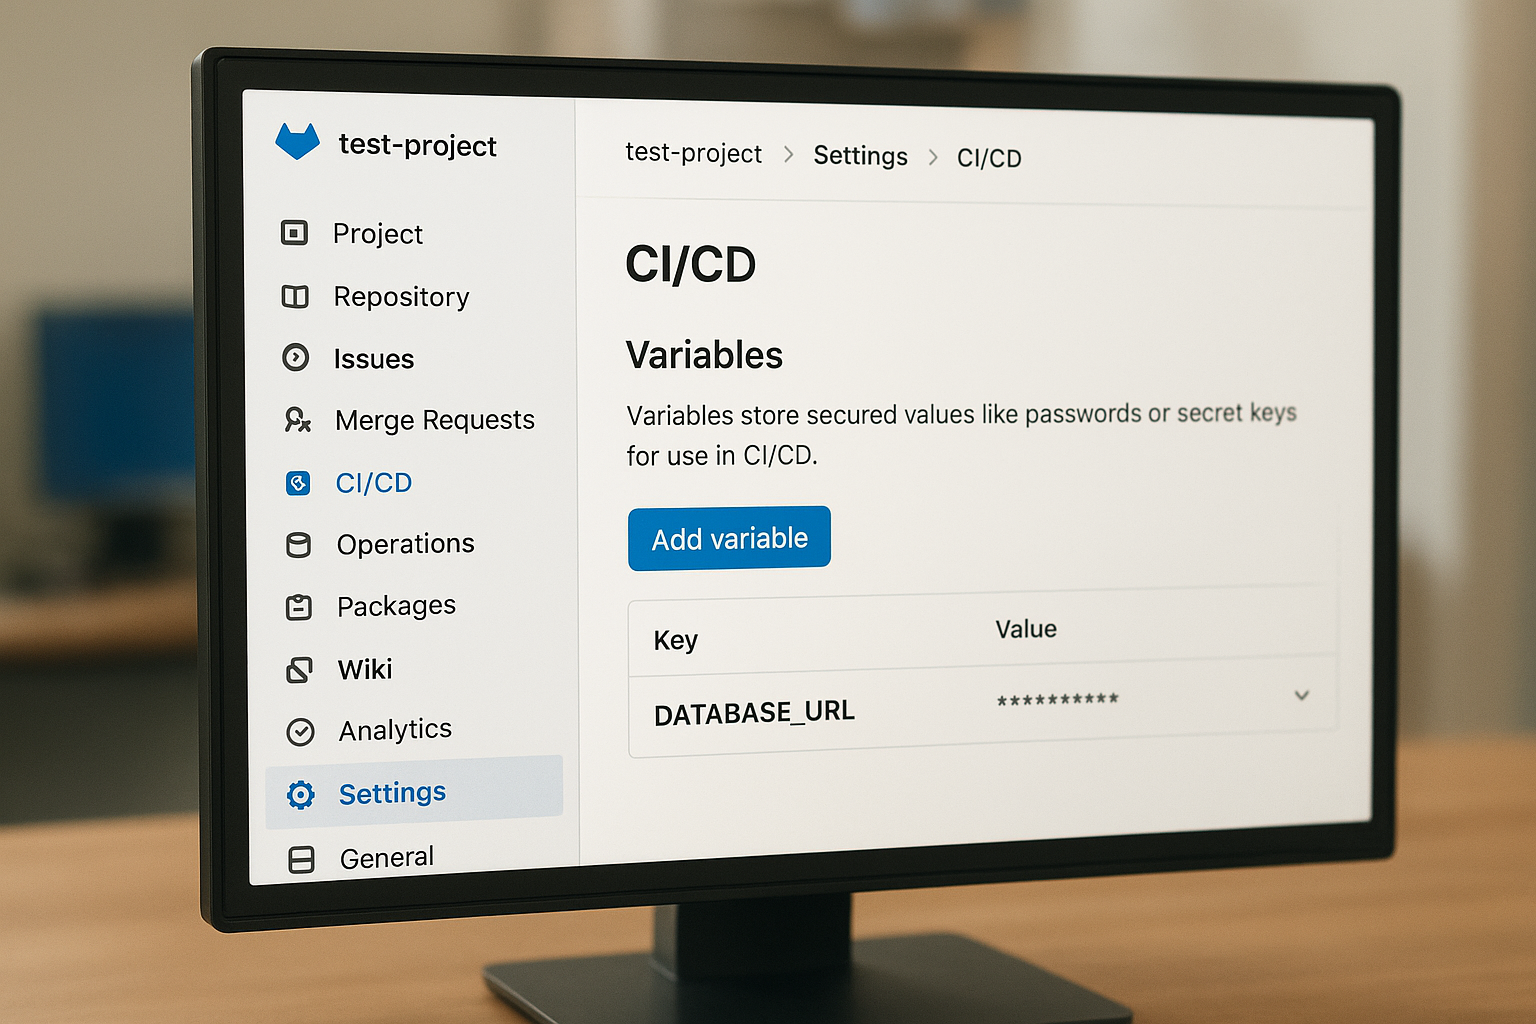
Group-level variables work the same way but apply across every project in the group, which is useful when multiple pipelines share the same credentials. Instance-level variables are reserved for GitLab administrators who need to distribute values across the entire GitLab instance.
Protect and mask every secret variable
GitLab gives you two critical toggles for each variable. Enable both for anything that qualifies as a gitlab ci cd secret:
| Toggle | What it does | When to enable |
|---|---|---|
| Protected | Restricts the variable to pipelines on protected branches or tags | Any credential that should never appear in a feature branch or fork pipeline |
| Masked | Scrubs the value from job logs whenever GitLab detects it in output | Every secret, without exception |
Always enable both "Protected" and "Masked" for sensitive variables unless you have a documented reason to leave one off.
Inject variables into your pipeline jobs
Once you store a variable, GitLab automatically makes it available as an environment variable inside every qualifying job. You reference it in your .gitlab-ci.yml using standard shell syntax:
deploy:
  stage: deploy
  script:
    - ./deploy.sh --db-url "$DATABASE_URL" --api-key "$THIRD_PARTY_API_KEY"
  only:
    - main
Your scripts receive the variable value at runtime without it ever appearing in the YAML file itself. Avoid printing variables directly with echo "$SECRET", because even masked variables can leak if you concatenate or transform them in ways GitLab's masking engine does not recognize.
Step 2. Control who can use secrets in pipelines
Storing a secret in GitLab's variable store is only half the problem. You also need to control which pipelines, which branches, and which team members can actually trigger jobs that access those secrets. Without proper access controls, a developer working on a feature branch could inadvertently run a job that exposes a production credential, even if the secret is masked from logs.
Restrict secrets to protected branches and tags
GitLab's "Protected" toggle on a CI/CD variable is the most direct control available. When you mark a variable as protected, only pipelines running on protected branches or protected tags can access it. A job running on an unprotected feature branch will see the variable as undefined, which means a developer who forks your repository and runs a pipeline will never touch your production credentials.
To protect a branch in GitLab, go to Settings > Repository > Protected branches, select the branch (typically main or release/*), and set merge and push permissions to "Maintainers" or a specific role. Once the branch is protected, any variable you mark as "Protected" automatically becomes inaccessible to jobs running on other branches.
Protecting a branch and protecting a variable are two separate steps, and both must be configured for the access control to work.
Scope variables to specific environments
GitLab lets you scope CI/CD variables to a named environment, so a secret only becomes available when a job targets that specific environment. This prevents a staging pipeline from accidentally using a production API key, and it keeps your gitlab ci cd secrets organized by deployment context rather than scattered across every job indiscriminately.
When adding or editing a variable in Settings > CI/CD > Variables, set the "Environment scope" field to the environment name you defined in your pipeline, such as production or staging. In your .gitlab-ci.yml, the environment keyword on the job determines which scoped variables the runner receives:
deploy_prod:
  stage: deploy
  environment:
    name: production
  script:
    - ./deploy.sh
Jobs that do not declare a matching environment will not receive environment-scoped secrets, even if the variable name matches. Use the wildcard * scope only for variables that genuinely need to be available across all environments, and treat that as the exception rather than the default.
Step 3. Pull secrets at runtime with OIDC
Storing long-lived credentials in GitLab's variable store works, but it introduces a persistent risk: those credentials exist somewhere and need to be rotated regularly. OpenID Connect (OIDC) offers a fundamentally different approach. Instead of pre-storing a credential, your pipeline requests a short-lived token at runtime from your cloud provider, uses it for the duration of the job, and discards it when the job ends. There is nothing to rotate on a schedule and nothing to leak from a variable store.
How OIDC authentication works in GitLab
When a GitLab runner starts a job, GitLab can issue it a JSON Web Token (JWT) that cryptographically identifies the pipeline, the project, the branch, and the environment. Your cloud provider, such as AWS, GCP, or Azure, is pre-configured to trust tokens signed by your GitLab instance. The runner presents this token to the provider, receives temporary credentials scoped to the exact permissions you defined, and uses those credentials to fetch secrets or perform deployment actions.
Short-lived OIDC credentials reduce your attack surface to the duration of a single pipeline job, not the lifetime of a stored key.
This flow eliminates the category of gitlab ci cd secrets that are long-lived API keys sitting in your settings. You configure a trust relationship once, and every job that needs cloud access generates its own ephemeral credential automatically, with no manual rotation required.
Configure OIDC with AWS in your pipeline
To use OIDC with AWS, first create an IAM Identity Provider in your AWS account pointing to your GitLab instance URL. Then create an IAM role with the permissions your pipeline needs and attach a trust policy that allows your specific GitLab project to assume it. In your .gitlab-ci.yml, use the id_tokens keyword to request a JWT, then exchange it for temporary AWS credentials using the AWS STS AssumeRoleWithWebIdentity call:

deploy:
  stage: deploy
  id_tokens:
    GITLAB_OIDC_TOKEN:
      aud: https://gitlab.com
  script:
    - CREDS=$(aws sts assume-role-with-web-identity
        --role-arn "$AWS_ROLE_ARN"
        --role-session-name "gitlab-$CI_JOB_ID"
        --web-identity-token "$GITLAB_OIDC_TOKEN"
        --query "Credentials.[AccessKeyId,SecretAccessKey,SessionToken]"
        --output text)
    - export AWS_ACCESS_KEY_ID=$(echo $CREDS | awk '{print $1}')
    - export AWS_SECRET_ACCESS_KEY=$(echo $CREDS | awk '{print $2}')
    - export AWS_SESSION_TOKEN=$(echo $CREDS | awk '{print $3}')
    - aws secretsmanager get-secret-value --secret-id my-app-secret
Your AWS_ROLE_ARN is the only value you store as a GitLab variable, and it carries no privilege on its own. AWS also requires a valid JWT from your specific project before it issues credentials, which means a pipeline from an unrelated project cannot impersonate your deployment even if it knows the role ARN.
Step 4. Prevent leaks in logs, artifacts, and MRs
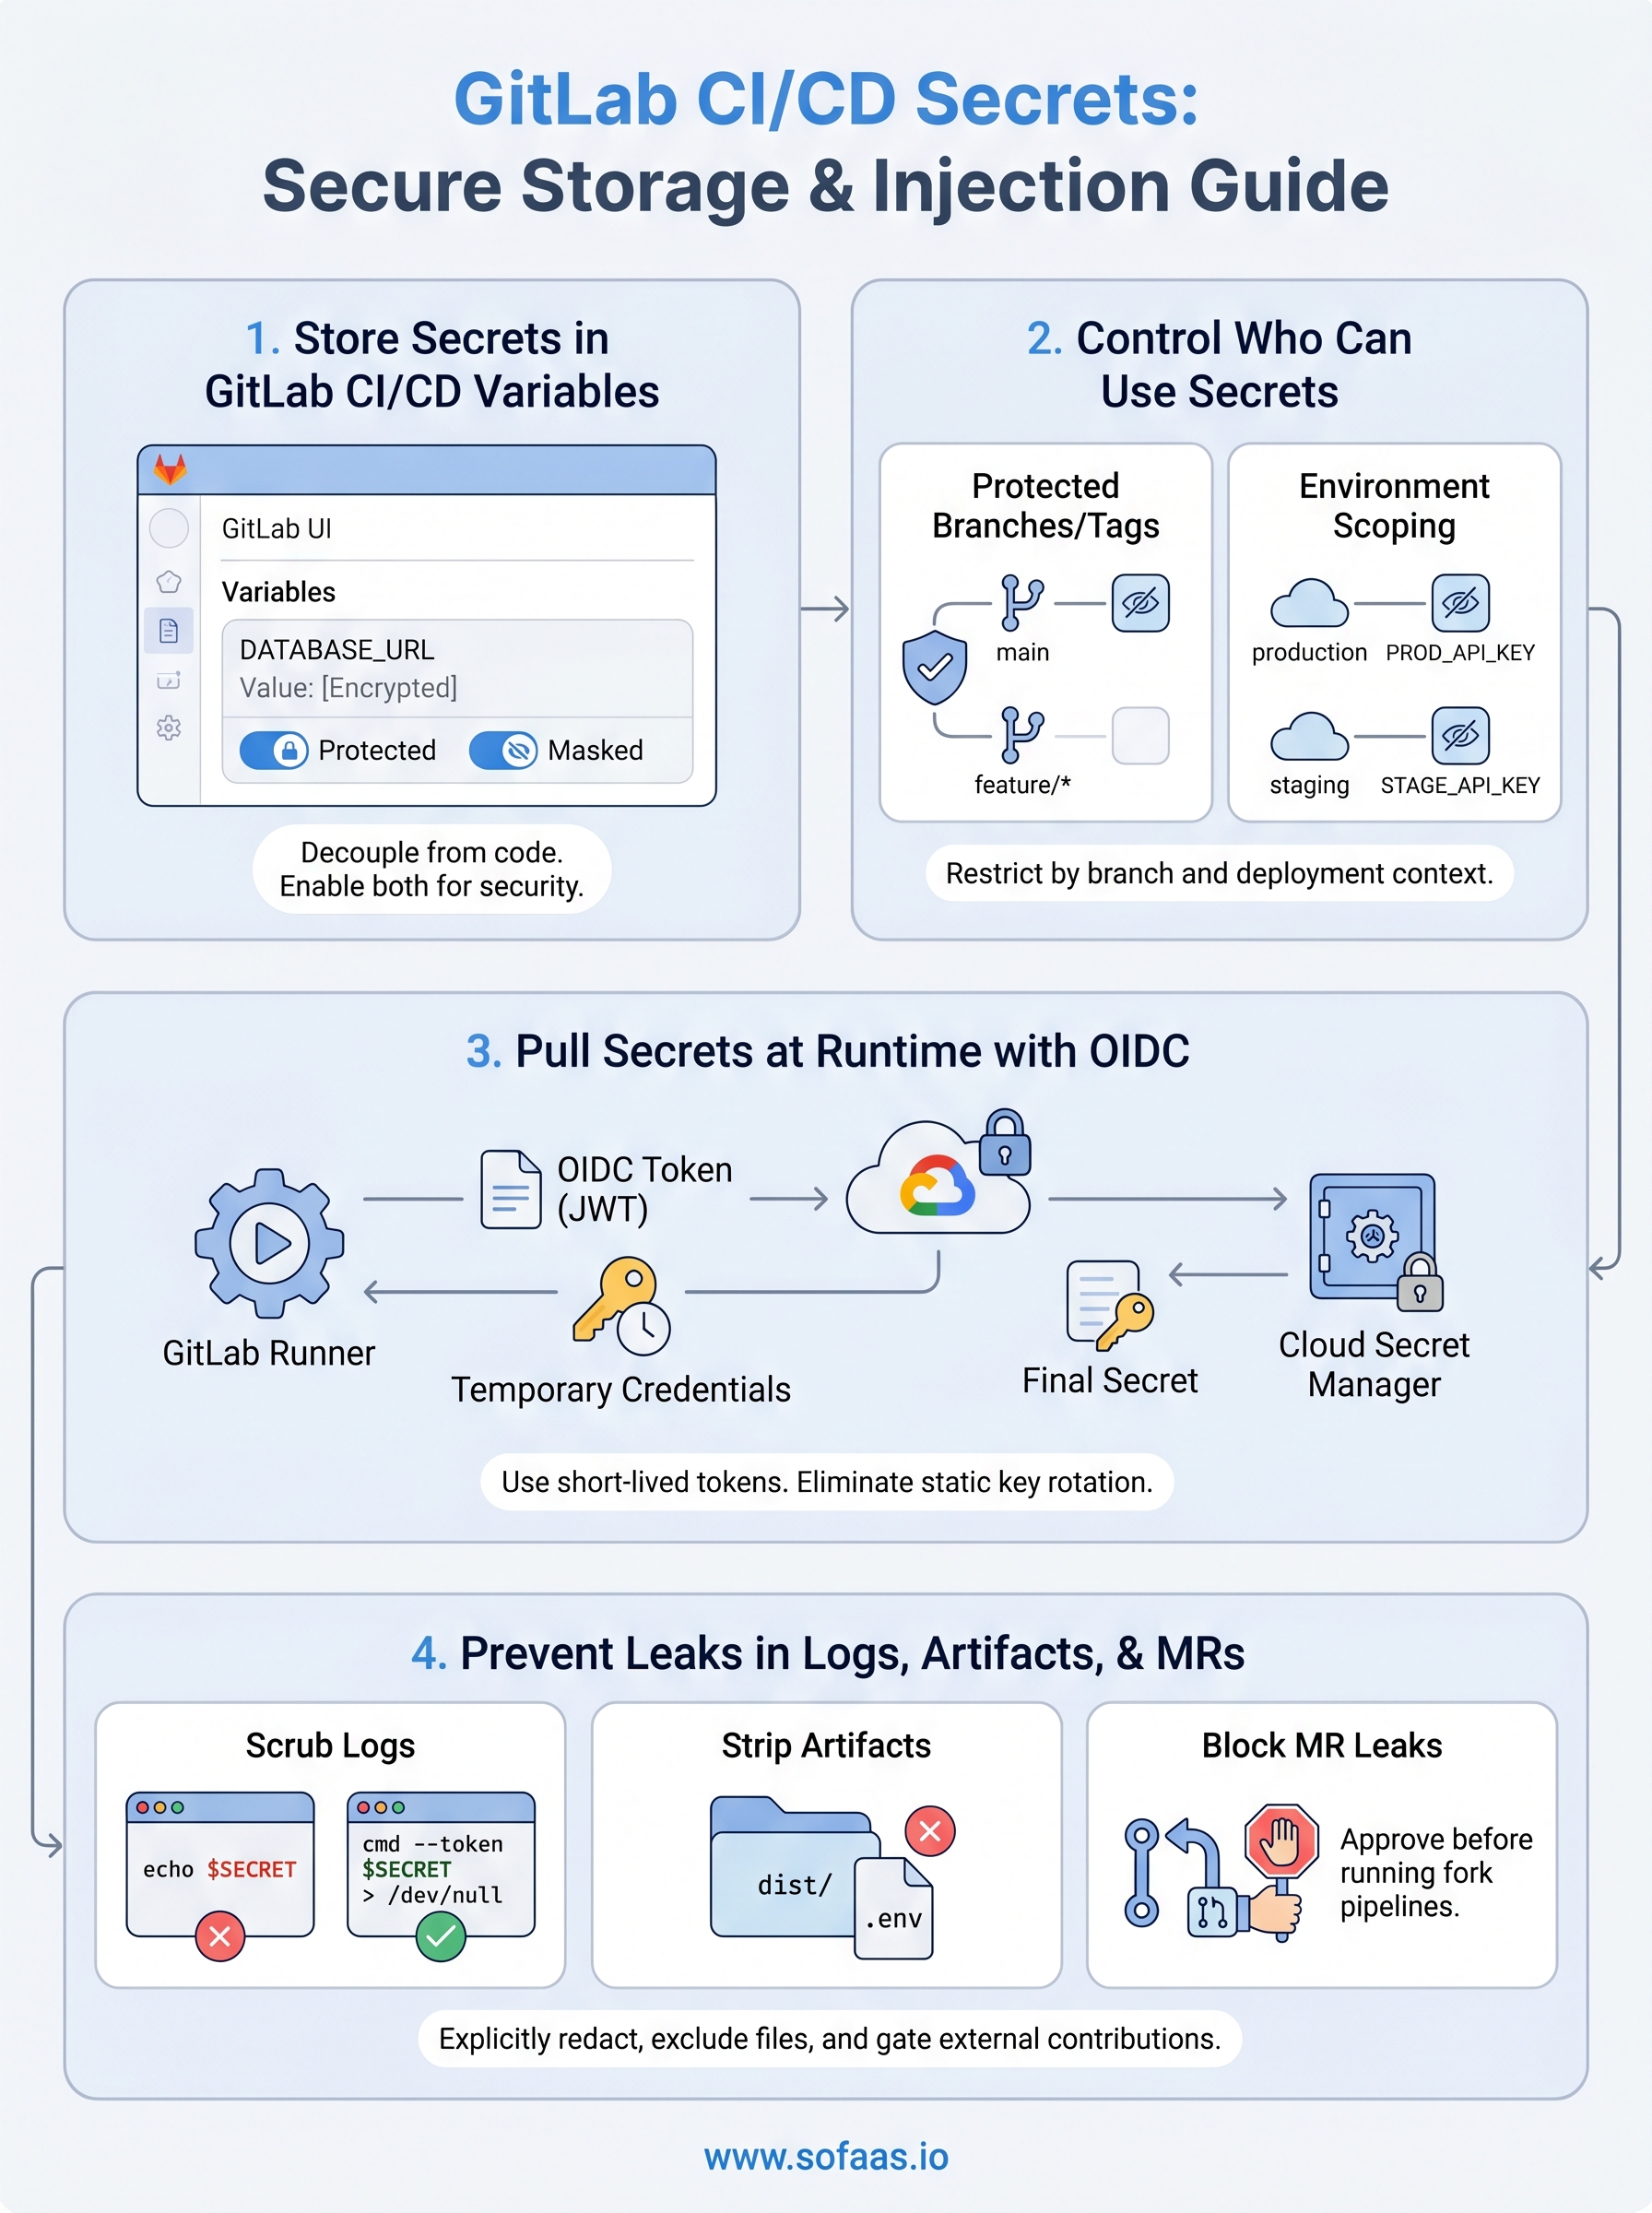
Even when you store gitlab ci cd secrets correctly and control access with protected branches, secrets can still surface in unexpected places: job logs, cached artifacts, and merge request pipeline output. Each of these channels represents a distinct leak vector, and you need to address all three deliberately rather than assuming GitLab's masking covers everything automatically.
Scrub sensitive values from job logs
GitLab's masking engine redacts a secret from logs only when the value appears verbatim as a continuous string. The moment you split, encode, or concatenate a variable, the masking engine misses it. Avoid patterns like echo "Token: $SECRET" or any shell command that embeds a secret inside a longer string. Instead, pass secrets directly as arguments to scripts and tools that handle them silently, and configure those tools to suppress verbose output in CI mode.
Never run
set -xin a job script that handles secrets, because shell trace mode prints every expanded variable value to stdout before GitLab's masking layer processes the line.
If a tool you rely on logs credentials by default, check whether it offers a quiet or no-log flag. For example, curl exposes authorization headers in verbose mode, so always combine -s with --oauth2-bearer rather than passing tokens through URL parameters.
Strip secrets from artifacts and caches
Job artifacts and cache archives are stored on your GitLab instance and can be downloaded by anyone with project access. Never write a secret to a file and then include that file path in your artifacts block. Check your artifacts: paths and cache: paths definitions explicitly and exclude directories where your scripts might drop temporary credential files:
artifacts:
  paths:
    - dist/
  exclude:
    - dist/**/*.env
    - dist/**/*.key
Remove any .env files, key exports, or token dumps from your artifact definitions before your pipeline reaches production.
Block secret exposure in merge request pipelines
Fork-based merge requests are the most overlooked leak path. By default, protected variables are unavailable to pipelines triggered from forks, but unprotected variables are not. Audit every variable in Settings > CI/CD > Variables and confirm that anything sensitive carries the "Protected" toggle. Set your project's merge request pipeline settings to require approval before running pipelines from outside contributors, which you configure under Settings > CI/CD > Pipelines for merge requests.
Next steps
You now have a complete framework for managing gitlab ci cd secrets across every stage of your pipeline lifecycle. Start by auditing your existing CI/CD variables and enabling both the Protected and Masked toggles on anything sensitive. Then scope each variable to the specific environment where it belongs, so credentials never bleed across deployment targets.
From there, plan your migration toward OIDC for any long-lived cloud credentials. The short-lived token model eliminates an entire class of rotation failures and shrinks your attack surface to the duration of a single job rather than the lifetime of a stored key. Pair that with strict artifact exclusion rules and fork pipeline approval gates, and you have a defensible posture that holds up under real compliance scrutiny.
If your pipelines handle regulated healthcare data and you need secure, compliant integrations with EHR systems like Epic or Cerner, explore what SoFaaS offers for SMART on FHIR deployments.
The Future of Patient Logistics
Exploring the future of all things related to patient logistics, technology and how AI is going to re-shape the way we deliver care.
Thank you! Your submission has been received!
Oops! Something went wrong while submitting the form.