Linkerd mTLS: Setup, Validation, And Certificate Rotation

Every request flowing between services in your Kubernetes cluster is a potential target. Linkerd mTLS solves this by automatically encrypting and authenticating service-to-service communication, no application code changes required. For teams building in healthcare, where HIPAA mandates encryption of protected health information in transit, getting mTLS right isn't optional. It's foundational.
At SoFaaS, we build managed healthcare integration infrastructure that connects applications to EHRs through SMART on FHIR. Enterprise-grade security sits at the core of everything we ship, including SOC 2 Type II compliance and end-to-end encryption. Linkerd's mTLS capabilities are one piece of the puzzle that teams like ours rely on to protect sensitive patient data as it moves between microservices, automatically and transparently.
But setting up Linkerd's mTLS correctly takes more than just installing the mesh. You need to understand how it generates and manages certificates, how to validate that encryption is actually happening, and how to handle certificate rotation before things break in production. Miss any of these steps, and you're either flying blind or heading toward an outage. This guide walks you through the full process: from initial setup to ongoing certificate management, so you can lock down inter-service traffic with confidence and keep it that way.
How Linkerd mTLS works and what to prepare
Linkerd implements mTLS by injecting a lightweight proxy sidecar into every pod you choose to mesh. When traffic moves between two meshed pods, their proxies handle the full TLS handshake, including mutual authentication, before any data crosses the wire. The application running inside the pod never manages certificates or even knows encryption is happening. Linkerd's control plane component, called the identity service, issues short-lived certificates to each proxy and renews them automatically, so there is no manual cert distribution to maintain.
The certificate hierarchy Linkerd uses
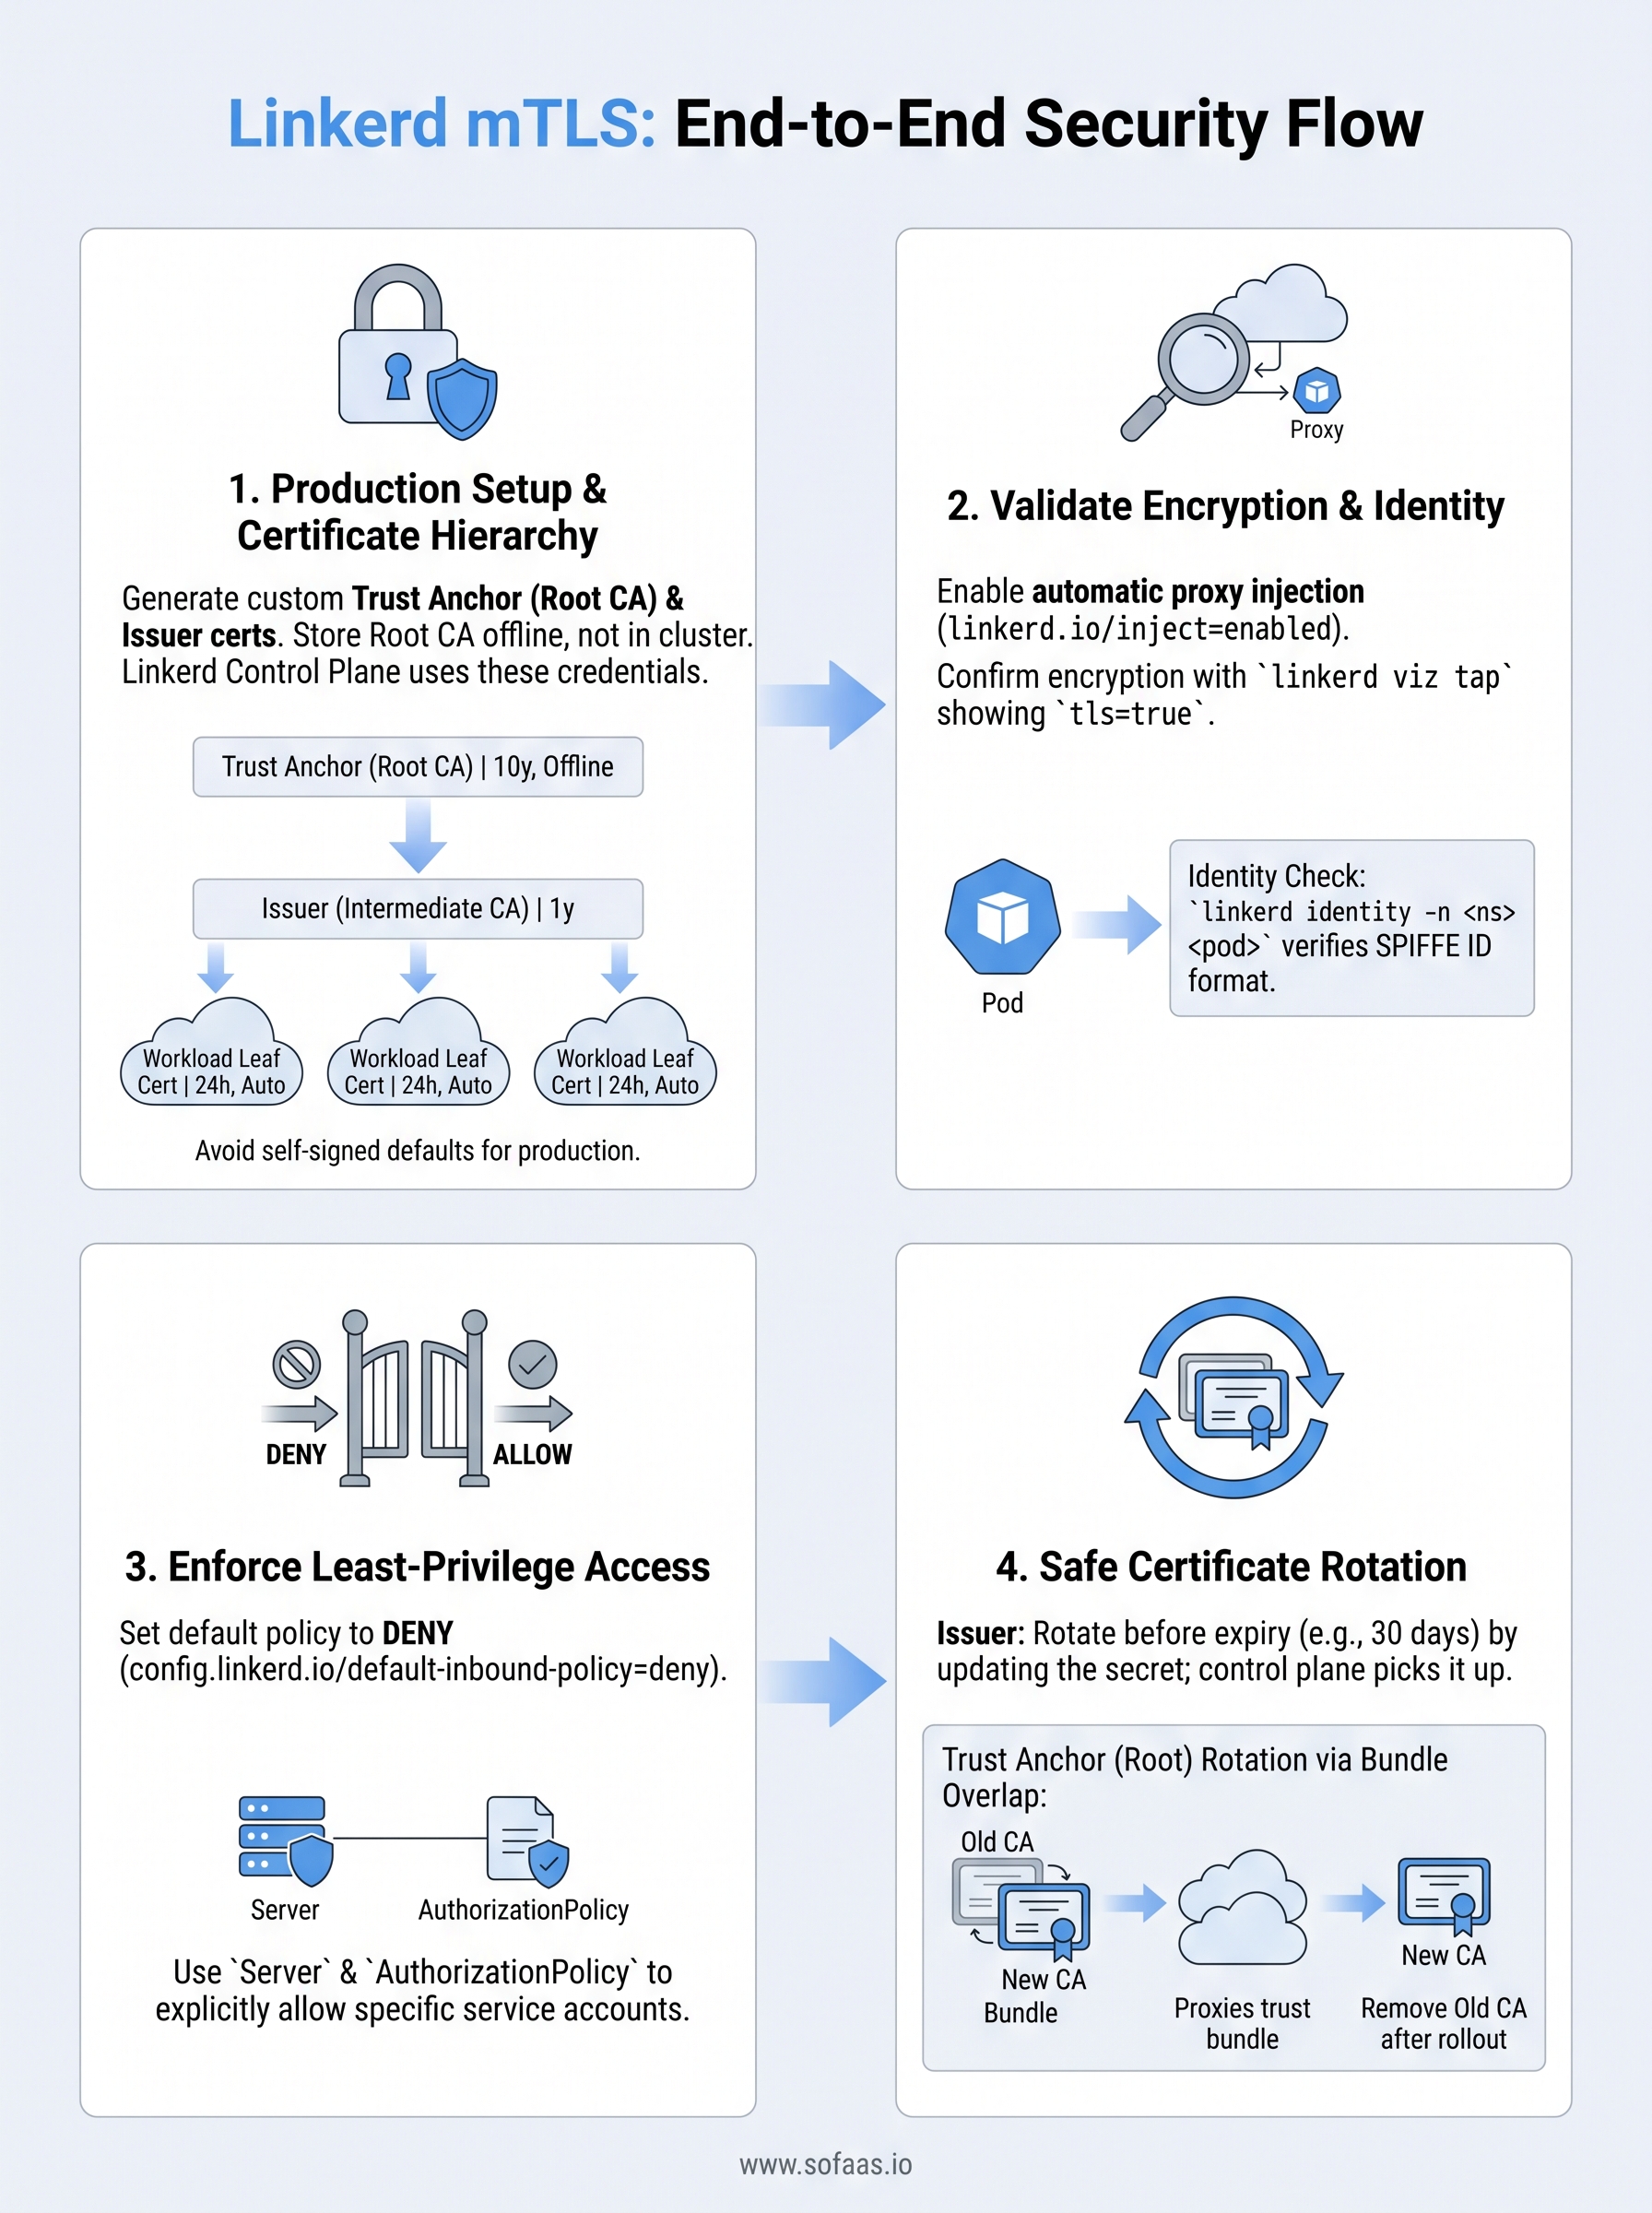
Linkerd mTLS relies on a three-level certificate chain to establish trust across your cluster. At the top sits the trust anchor, a root CA certificate you generate and keep secure. Below it is the issuer certificate, an intermediate CA that the Linkerd identity service uses to sign workload certificates. Each meshed workload then receives a SPIFFE-compliant leaf certificate tied to its Kubernetes service account identity, in the form service-account.namespace.serviceaccount.cluster.local. This identity is what proxies present and verify during every mTLS handshake.
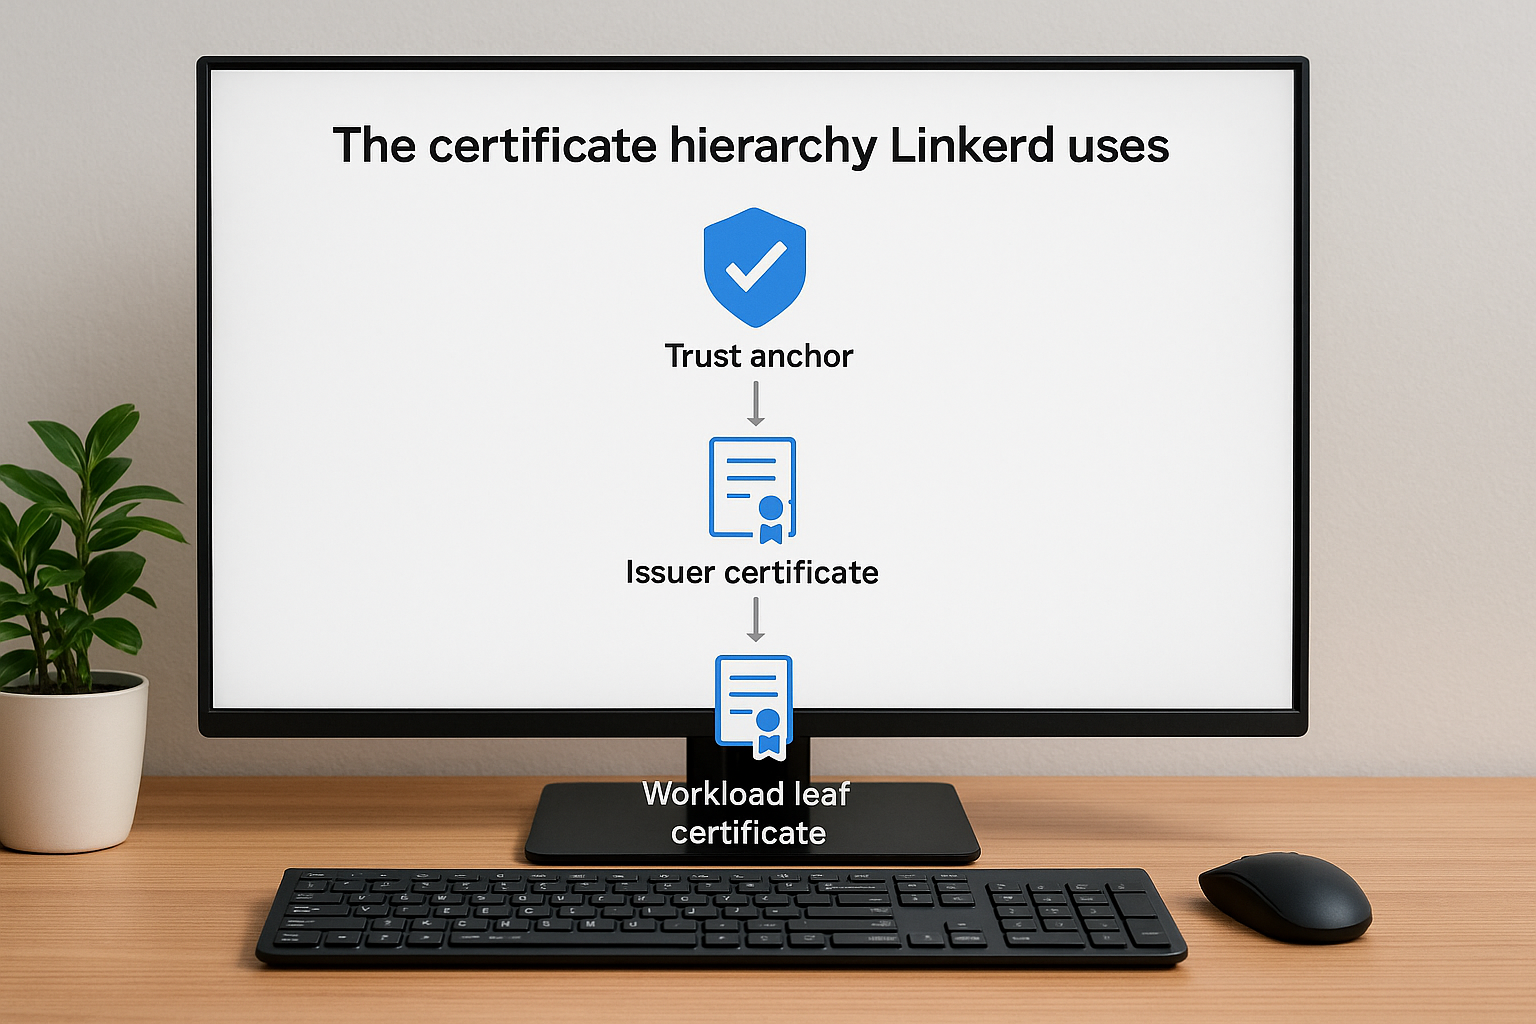
Linkerd rotates workload leaf certificates every 24 hours by default, which keeps the exposure window small if a certificate is ever compromised.
Understanding this chain matters because each level has a different lifetime and a different owner. Here is how they break down:
| Certificate level | Recommended lifetime | Who manages it |
|---|---|---|
| Trust anchor (root CA) | 10 years | You, stored offline or in a secrets manager |
| Issuer certificate (intermediate CA) | 1 year | You, via cert-manager or manual renewal |
| Workload leaf certificate | 24 hours | Linkerd identity service, automatically |
What you need before you install
Before you run any Linkerd commands, confirm that your Kubernetes cluster is version 1.21 or later and that your local kubectl context has cluster-admin permissions. You also need the Linkerd CLI installed on your workstation. Fetch it with:
curl --proto '=https' --tlsv1.2 -sSfL https://run.linkerd.io/install | sh
export PATH=$PATH:$HOME/.linkerd2/bin
After installing, run linkerd check --pre to confirm your cluster meets all prerequisites before you touch any certificates.
You also need a clear plan for generating and storing your trust anchor and issuer certificates before installation. Many teams use step CLI for quick generation or cert-manager for automated rotation. In production, never store the trust anchor private key inside the cluster itself. If that cluster is ever compromised, an attacker with access to the root key can forge any workload identity in your mesh. Decide where the root key lives, whether that is an HSM, a secrets manager, or an encrypted offline store, and document the recovery process before you write a single certificate to disk.
Step 1. Install Linkerd with production credentials
Installing Linkerd for production means you bring your own certificates instead of relying on self-signed credentials that Linkerd generates automatically. The automatic option works fine for quick demos, but those certificates are not meant for production use and give you no control over rotation schedules or key storage. To get Linkerd mTLS working correctly in a real environment, you generate your trust anchor and issuer credentials yourself before the control plane ever touches your cluster.
Generate the trust anchor and issuer certificates
Your first task is producing the two CA certificates that anchor the entire chain. Use the step CLI to generate them with appropriate lifetimes:
# Generate the trust anchor (root CA)
step certificate create root.linkerd.cluster.local ca.crt ca.key \
  --profile root-ca \
  --no-password \
  --insecure \
  --not-after 87600h

# Generate the issuer certificate signed by the trust anchor
step certificate create identity.linkerd.cluster.local issuer.crt issuer.key \
  --profile intermediate-ca \
  --not-after 8760h \
  --no-password \
  --insecure \
  --ca ca.crt \
  --ca-key ca.key
Store ca.key outside the cluster immediately after this step. An external secrets manager or offline encrypted storage keeps that root key safe if your cluster is ever compromised.
Never commit certificate private keys to version control, even temporarily. A brief window in Git history is enough to expose your entire trust chain.
Install the control plane with your certificates
With your certificates ready, pass them directly to the Linkerd install command so the control plane picks them up from the start:
linkerd install \
  --identity-trust-anchors-file ca.crt \
  --identity-issuer-certificate-file issuer.crt \
  --identity-issuer-key-file issuer.key \
  | kubectl apply -f -
After the install completes, run linkerd check to confirm all control plane components are healthy and the identity service accepted your certificates. Every line should return a green checkmark before you proceed to meshing any workloads.
Step 2. Mesh workloads and confirm encryption
With your control plane running, you now need to bring your workloads into the mesh so Linkerd mTLS can actually protect their traffic. Linkerd injects a proxy sidecar into each pod, and that proxy handles all encryption and authentication transparently. The process starts at the namespace level, and you have two ways to trigger injection: automatic injection for all pods in a namespace, or manual injection for individual deployments.
Annotate namespaces and enable automatic injection
The cleanest approach for production is to annotate your namespaces so Linkerd automatically injects the proxy into every new pod that lands there. Apply the annotation with a single command:
kubectl annotate namespace your-namespace \
  linkerd.io/inject=enabled
After annotating, you need to restart your existing deployments so the running pods pick up the sidecar. A rolling restart handles this without downtime:
kubectl rollout restart deployment -n your-namespace
Verify the injection succeeded by checking that each pod now shows two containers, one for your application and one for the Linkerd proxy:
kubectl get pods -n your-namespace
# Look for 2/2 in the READY column
Confirm that traffic is encrypted end to end
Once your pods are meshed, use linkerd viz tap to watch live traffic and confirm mTLS is active on each connection. First, install the viz extension if you have not already:
linkerd viz install | kubectl apply -f -
Then tap a specific deployment to inspect its traffic metadata:
linkerd viz tap deployment/your-deployment -n your-namespace
Each line in the output includes a tls=true field when encryption is working. Any connection showing tls=false means one of the two endpoints is not meshed, and you need to investigate before moving forward.
If you see unmeshed traffic, check whether the source namespace also has the
linkerd.io/inject=enabledannotation and restart those pods too.
Step 3. Validate mTLS and inspect identities
Enabling injection and seeing tls=true in tap output gives you a good signal, but proper validation goes deeper. You need to confirm that each workload holds a valid certificate tied to the correct identity and that the trust chain resolves back to your trust anchor. Linkerd provides built-in CLI commands to do this without reaching into Kubernetes secrets manually.
Check workload identities with the CLI
The linkerd identity command pulls the certificate details for a running pod directly from the proxy. Point it at any pod in your meshed namespace and you get the full SPIFFE identity and certificate metadata back in readable output:
linkerd identity -n your-namespace \
  $(kubectl get pod -n your-namespace -l app=your-app -o jsonpath='{.items[0].metadata.name}')
This output shows the subject, issuer, and expiration date of the leaf certificate currently held by that proxy. Confirm that the subject matches the expected format system:serviceaccount:your-namespace:your-service-account and that the issuer points to your intermediate CA, not a Linkerd-generated default.
If the issuer shows
identity.linkerd.cluster.localinstead of your custom issuer CN, the control plane did not pick up your certificates correctly during installation and you need to reinstall with the correct flags.
Inspect the certificate chain end to end
Validating linkerd mtls also means confirming the full chain from leaf to trust anchor. Use openssl to parse the certificate directly from the proxy's debug endpoint, which each Linkerd proxy exposes on port 4191:
kubectl exec -n your-namespace \
  $(kubectl get pod -n your-namespace -l app=your-app -o jsonpath='{.items[0].metadata.name}') \
  -c linkerd-proxy -- \
  openssl s_client -connect localhost:4143 -showcerts 2>/dev/null \
  | openssl x509 -noout -text
Review the Subject Alternative Name field to verify the SPIFFE URI and check the Not After timestamp to confirm the 24-hour rotation window is working as expected. Run this check against a few pods across different namespaces to catch any inconsistencies before moving to policy enforcement.
Step 4. Enforce mTLS and least-privilege access
Confirming that traffic is encrypted is only half the job. Without authorization policy, any meshed workload can still talk to any other meshed workload freely, which violates the principle of least privilege. Linkerd's policy resources let you lock this down by defining exactly which services can communicate and over which routes, giving you fine-grained control over your mesh traffic that goes well beyond encryption alone.
Define a default deny policy
Your first move is to set a default deny posture at the namespace level. This blocks all unauthenticated or unexpected traffic by default, forcing you to explicitly allow only what you need. Apply the annotation to each namespace where you want strict enforcement:
kubectl annotate namespace your-namespace \
  config.linkerd.io/default-inbound-policy=deny
Set this annotation before enabling injection in production namespaces so no workload starts accepting unauthenticated connections during the rollout window.
After applying the annotation, restart your deployments again to pick up the new policy. Any request that does not match an explicit Server or AuthorizationPolicy resource will be rejected with a connection refused response at the proxy level, never reaching your application container.
Scope access with Server and HTTPRoute policies
With the default set to deny, you now define exactly who can reach each service. The Server resource tells Linkerd which port a workload listens on, and AuthorizationPolicy binds an identity to that server, allowing only named service accounts to connect. Here is a minimal example that allows only your frontend service account to reach your backend on port 8080:
apiVersion: policy.linkerd.io/v1beta3
kind: Server
metadata:
  name: backend-server
  namespace: your-namespace
spec:
  podSelector:
    matchLabels:
      app: backend
  port: 8080
---
apiVersion: policy.linkerd.io/v1alpha1
kind: AuthorizationPolicy
metadata:
  name: backend-allow-frontend
  namespace: your-namespace
spec:
  targetRef:
    group: policy.linkerd.io
    kind: Server
    name: backend-server
  requiredAuthenticationRefs:
    - name: frontend-sa
      kind: MeshTLSAuthentication
      group: policy.linkerd.io
This approach ties linkerd mtls enforcement directly to Kubernetes service account identities, so access control stays auditable and version-controlled alongside your other manifests.
Step 5. Rotate trust anchors and issuers safely
Certificate rotation is where most teams hit production problems. Issuer certificates expire on a fixed schedule, and if you miss the renewal window, your Linkerd identity service stops issuing workload certs, which breaks all inter-service communication across your mesh. Rotating linkerd mtls certificates correctly means handling the issuer and trust anchor separately, because each one requires a different approach to avoid downtime.
Rotate the issuer certificate without downtime
Your issuer certificate is the safer one to rotate because Linkerd supports a bundle of trust anchors, which lets you introduce a new issuer while the old one is still valid. Start by generating a fresh issuer certificate signed by the same trust anchor:

step certificate create identity.linkerd.cluster.local issuer-new.crt issuer-new.key \
  --profile intermediate-ca \
  --not-after 8760h \
  --no-password \
  --insecure \
  --ca ca.crt \
  --ca-key ca.key
Then update the Kubernetes secret that holds your issuer credentials before the current certificate expires:
kubectl create secret generic linkerd-identity-issuer \
  --namespace=linkerd \
  --from-file=tls.crt=issuer-new.crt \
  --from-file=tls.key=issuer-new.key \
  --dry-run=client -o yaml \
  | kubectl apply -f -
The identity service picks up the new secret automatically without requiring a control plane restart.
Rotate your issuer at least 30 days before its expiration date to give yourself room to troubleshoot if something goes wrong.
Rotate the trust anchor with a bundle overlap
Rotating the root trust anchor requires more care because every proxy in your cluster must trust both the old and new anchor simultaneously during the transition. You achieve this by building a combined PEM bundle that contains both certificates and updating your linkerd-config ConfigMap before removing the old anchor:
cat ca-old.crt ca-new.crt > ca-bundle.crt
kubectl create configmap linkerd-config \
  --namespace=linkerd \
  --from-file=ca-bundle.crt=ca-bundle.crt \
  --dry-run=client -o yaml \
  | kubectl apply -f -
Once all proxies have restarted and you confirm they trust the new root with linkerd check, remove the old anchor from the bundle and repeat the ConfigMap update to complete the rotation cleanly.
Wrap up and keep your mesh secure
You now have a complete picture of how linkerd mtls works, from certificate generation and control plane installation through workload injection, identity validation, policy enforcement, and safe rotation. Each step builds on the one before it, and skipping any of them leaves gaps that compromise the security guarantees you set out to achieve.
The most important habit you can build from here is treating certificate rotation as a scheduled maintenance task, not a crisis response. Set calendar reminders at least 30 days before your issuer certificate expires, and run linkerd check regularly to catch drift before it becomes an outage. Keep your trust anchor key off the cluster, version-control your policy manifests, and re-validate workload identities after every major deployment.
If you are building healthcare applications that handle protected patient data, the encryption layer inside your cluster is just one piece of the compliance picture. See how SoFaaS manages secure EHR integration end to end so you can focus on building instead of plumbing.
The Future of Patient Logistics
Exploring the future of all things related to patient logistics, technology and how AI is going to re-shape the way we deliver care.
Thank you! Your submission has been received!
Oops! Something went wrong while submitting the form.