HL7 FHIR Validator: How To Validate Resources And Profiles

Every FHIR resource your application sends or receives carries a risk: if it doesn't conform to the specification, EHR systems will reject it, integrations will break, and patient data won't flow where it needs to go. An HL7 FHIR validator catches these problems before they reach production, checking your resources against base FHIR specifications, implementation guides, and custom profiles to confirm everything is structurally and semantically correct.
But picking the right validator, and knowing how to use it, isn't always straightforward. There are online tools, downloadable JAR files, CLI options, and GUI applications, each with different strengths depending on your workflow. Some are better for quick spot-checks during development; others fit into automated CI/CD pipelines for continuous validation at scale.
This guide walks you through the major FHIR validation tools available, how to use them, and when each one makes the most sense. At SoFaaS, we handle FHIR-based EHR integrations daily, our platform manages the complexity of connecting healthcare applications to systems like Epic, Cerner, and Allscripts, so resource validation is core to what we do. We wrote this to give you a practical, no-fluff reference for getting validation right in your own projects.
What FHIR validation covers and what you need first
FHIR validation is not a single check. When you run an hl7 fhir validator against a resource, it evaluates multiple layers simultaneously: structure, cardinality, data types, value sets, and profile conformance. Each layer can surface different categories of errors, and skipping any one of them means shipping code that will silently fail against real EHR endpoints.
What the validator actually checks
At the base level, validators confirm that your resource is well-formed JSON or XML and that every element matches the expected data type defined in the FHIR specification. Beyond structure, they check cardinality rules, meaning whether required fields are present and whether repeated fields stay within allowed counts. After that, terminology validation kicks in, verifying that coded values like SNOMED CT, LOINC, or ICD-10 codes actually exist in the referenced value sets.

Profile conformance is where most integration failures happen: a resource can be valid FHIR R4 and still be rejected by Epic or Cerner if it does not satisfy their specific implementation guide constraints.
Profile validation adds another layer on top of base-spec checks. A profile is a set of constraints defined in a StructureDefinition that tightens or extends the base resource for a specific use case. For example, the US Core Patient profile mandates certain identifiers and name fields that base FHIR R4 does not require. If you are connecting to an EHR through an implementation guide like US Core or Da Vinci, your resources must pass both the base-spec level and the profile level to be accepted.
What you need before you start
Before you run any validation, gather three things: the FHIR version your target EHR uses (R4 is now standard, but some legacy systems still run STU3), the implementation guide package for that EHR or program (downloadable as an NPM package from the FHIR package registry), and a sample resource file in either JSON or XML. Without the correct IG package loaded, your validator will only check base-spec conformance and miss the profile constraints that actually matter for your integration.
Here is a quick checklist to confirm you are ready:
- FHIR version confirmed (R4, R4B, or STU3)
- Target IG package downloaded (e.g.,
hl7.fhir.us.core#6.1.0) - Sample resource file ready in JSON or XML
- Validator tool installed or accessible via browser
- Terminology server URL noted if you need external code validation
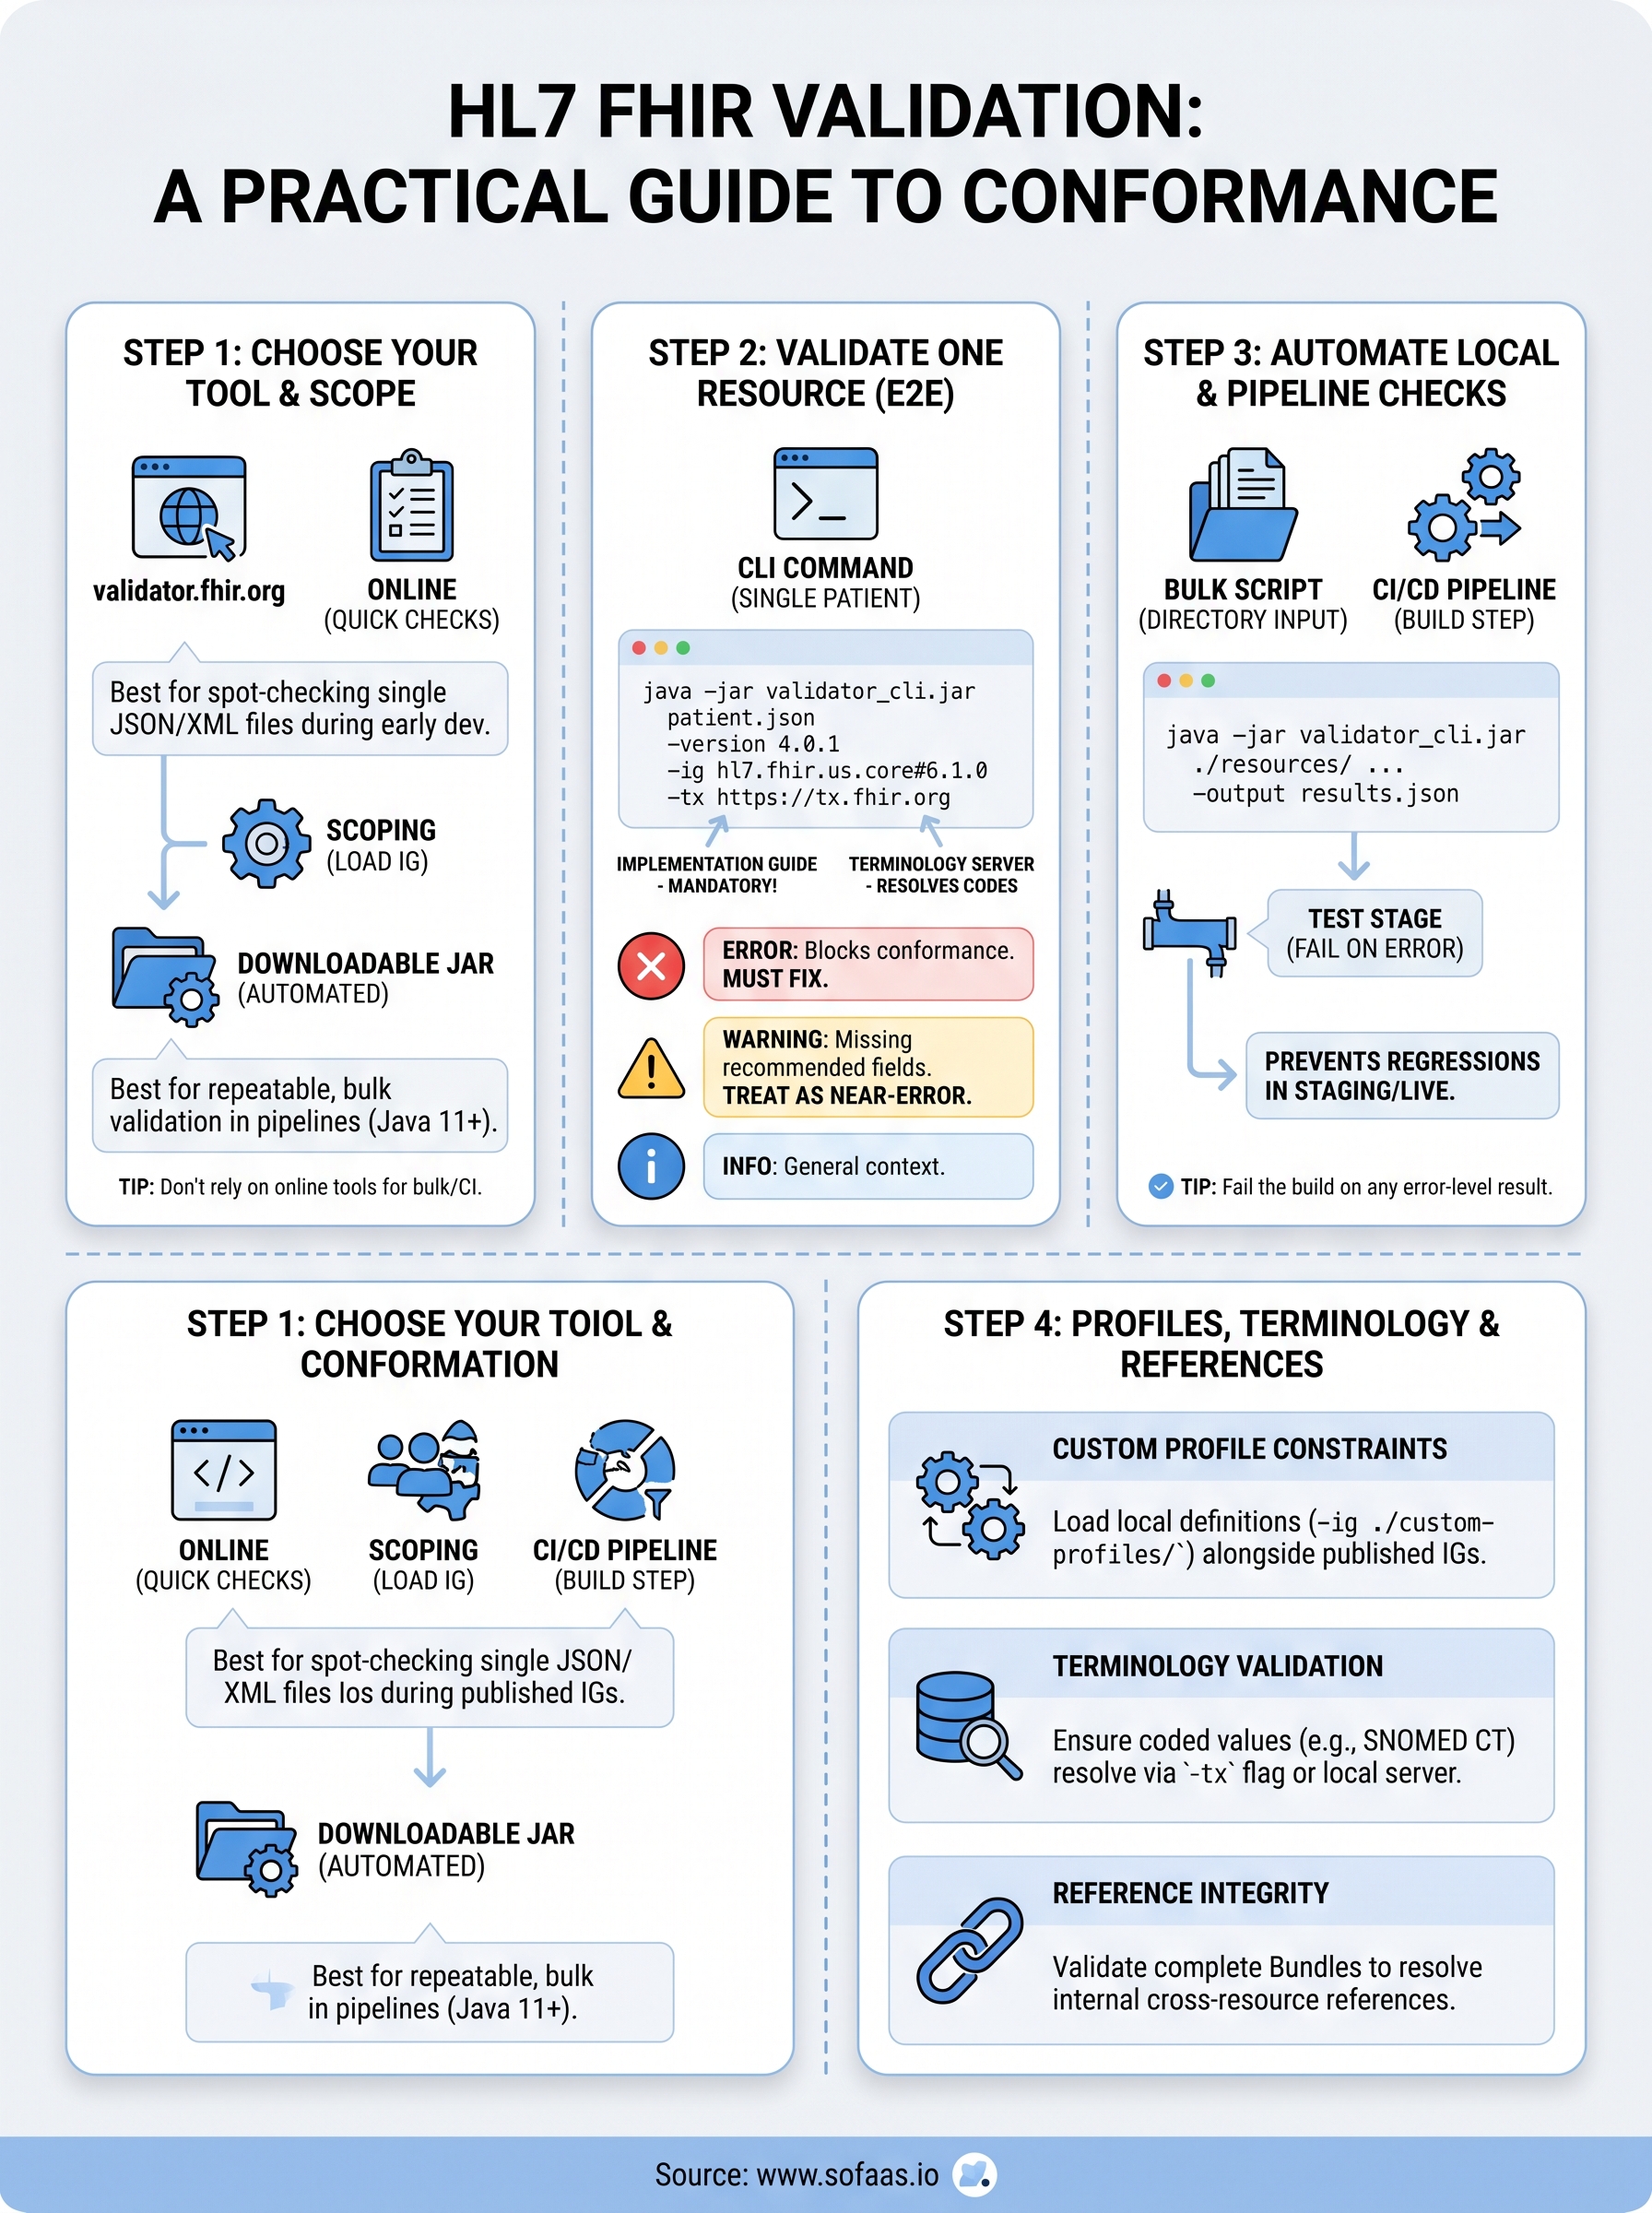
Step 1. Choose the right validator and scope
Your first decision determines how much friction you add to your workflow. The three main options are the official HL7 FHIR Validator (available as a web tool and downloadable JAR), the Inferno test suite for US Core and ONC certification testing, and validators built into editors like VS Code through FHIR extensions. Each one fits a different point in your development cycle, and picking the wrong one for a given task wastes time and produces incomplete results.
Online tools for early development
The web-based hl7 fhir validator at validator.fhir.org is the fastest way to check a single resource without installing anything. You paste your JSON or XML, select your FHIR version, and add an implementation guide package by its NPM identifier. It runs the same validation engine as the downloadable JAR, so results are consistent between environments.
Use the online tool for quick spot-checks during early development, but do not rely on it for automated or bulk validation.
Setting the right scope matters as much as choosing the tool itself. If you select only base R4 without loading your target IG, you will miss profile-level errors that real EHR endpoints enforce. Always load the relevant IG package before you trust your results.
The official JAR for local and pipeline use
Download the validator JAR from the official HL7 GitHub releases page when you need repeatable, automated validation across multiple resources. The JAR runs on any system with Java 11 or later and accepts a single resource or an entire directory as input. This is the right choice once you move past initial testing and into pre-deployment checks or CI/CD integration.
Step 2. Validate one resource end to end
With your tool selected and your IG package ready, the fastest way to build confidence is to run a single resource through validation and read every line of the output. Use a Patient resource for this first pass since it appears in nearly every integration and is required by US Core and most EHR implementation guides. Getting one resource to pass completely before moving to bulk validation keeps you from chasing cascading errors across dozens of files at once.
Run the validator JAR on a Patient resource
Start with the official validator JAR to keep your results consistent with what downstream EHR endpoints actually enforce. Save your Patient resource as patient.json in your working directory, then run the following command to validate it against US Core 6.1.0:
java -jar validator_cli.jar patient.json \
  -version 4.0.1 \
  -ig hl7.fhir.us.core#6.1.0 \
  -tx https://tx.fhir.org
Loading the correct IG package with
-igis the step most developers skip, and it is the reason resources pass local checks but fail against real EHR endpoints.
This command runs the hl7 fhir validator engine against FHIR R4 and loads the US Core IG so profile constraints are enforced alongside base-spec rules. The -tx flag points to the public FHIR terminology server, which resolves code system lookups for SNOMED CT, LOINC, and ICD-10 codes in real time.
Interpret the output
The validator returns three severity levels: information, warning, and error. Errors block conformance and must be fixed before submission. Warnings often flag missing recommended fields that specific EHRs treat as required, so handle them as near-errors during integration work rather than optional cleanup items you can defer.
Step 3. Validate locally and automate checks
Once you can validate a single resource cleanly, the next step is to run the hl7 fhir validator across your full resource library and connect it to your build process. Manual spot-checks catch individual errors, but automated validation catches regressions before they reach a staging environment or a live EHR endpoint. Building this into your workflow early saves hours of debugging later.
Set up a bulk validation script
Running the validator JAR against a directory of resources requires only one small change to the command from Step 2. Point the input argument at your resources folder instead of a single file, and the validator processes every JSON or XML file it finds:
java -jar validator_cli.jar ./resources/ \
  -version 4.0.1 \
  -ig hl7.fhir.us.core#6.1.0 \
  -tx https://tx.fhir.org \
  -output results.json
The -output flag writes all results to a single JSON file, which makes it straightforward to parse errors programmatically or feed the output into a reporting tool your team already uses.
Add validation to your CI/CD pipeline
Connecting validation to your pipeline means errors get caught on every pull request, not just when someone remembers to run a manual check. Add the validator JAR to your repository or pull it as a build-step artifact, then call the bulk script above as part of your test stage.

Fail the build on any error-level result so that broken resources never merge into your main branch.
Your pipeline should treat warnings as reviewable but non-blocking until you establish a clean baseline, then tighten the threshold as your resource library stabilizes and your team builds confidence in the output.
Step 4. Validate profiles, terminology, and references
Bulk validation covers structure and cardinality, but three specific areas demand focused attention before you call a resource ready: custom profile constraints, coded terminology values, and cross-resource references. Each one requires a slightly different approach in the hl7 fhir validator, and skipping any of them produces integration failures that are difficult to trace once you are working against a live EHR endpoint.
Profile constraints
When you build against a custom StructureDefinition, load it directly using the -ig flag with a local directory path instead of a registry package name. This tells the validator to apply your custom constraints alongside base-spec rules:
java -jar validator_cli.jar bundle.json \
  -version 4.0.1 \
  -ig ./custom-profiles/ \
  -ig hl7.fhir.us.core#6.1.0 \
  -tx https://tx.fhir.org
You can stack multiple
-igflags to load both a published IG and your own custom profiles in a single validation run.
Terminology validation
Coded fields like Condition.code or Observation.code must resolve against the correct code system. The public terminology server at https://tx.fhir.org handles most standard code systems, but if you use proprietary or local value sets, point the -tx flag at your own terminology server URL so every code lookup resolves correctly rather than returning an unresolvable warning.
Reference integrity
Resource references like subject, encounter, and performer must point to a valid resource type. Pass a complete Bundle containing all referenced resources to the validator so it can confirm that every internal reference resolves correctly, rather than flagging each one as unresolvable due to missing context.
Final checks before you ship
Before you mark your integration ready, run the hl7 fhir validator one final time against a complete Bundle that includes every resource type your application will send. Confirm that all errors are resolved and that warnings are intentional and documented. Check that the correct IG version is loaded, not just the base spec, because EHR endpoints enforce profile constraints that base-spec-only validation will miss.
Then verify your terminology server resolved every code lookup without fallback warnings. Unresolvable codes are silent failures in some EHR systems, meaning the resource submits without an error but stores incorrect or missing data. Finally, test your validation script in your CI/CD pipeline with a deliberate error to confirm the build actually fails when it should.
If managing FHIR validation, profile constraints, and EHR connectivity feels like more infrastructure than your team wants to maintain, connect your app through SoFaaS and let the platform handle it for you.
The Future of Patient Logistics
Exploring the future of all things related to patient logistics, technology and how AI is going to re-shape the way we deliver care.
Thank you! Your submission has been received!
Oops! Something went wrong while submitting the form.